Loose Speaker Wire? 3 Reasons to Switch to Banana Plugs in 2026
It was late one evening when I finally cranked up my home theater system after a long week. As I settled into the sofa, I noticed an odd crackling coming from my speakers. My heart sank—turns out, my loose speaker wires had oxidized, causing poor sound quality and risking damage to my high-end amplifier. That frustrating moment was a clear wake-up call: I was still using bare wire connections, thinking they were good enough. But I quickly realized that small details, like the connectors I used, could make or break my audio experience.
Why Switching to Banana Plugs Is a Game-Changer
Over the years, I’ve experimented with various speaker wire setups. What I discovered is that upgrading to banana plugs transformed my system’s clarity and safety. In the end, I made three important changes that I want to share with you today. Whether you’re an audiophile or just someone who appreciates crisp sound, understanding why banana plugs are worth considering can save you headaches and money in the long run. If you’re tired of dealing with oxidized wires or inconsistent connections, this post is your friendly guide to making smarter choices for 2026.
Is All the Hype About Banana Plugs Just Marketing?
Let me be honest—I made a mistake early on, assuming that all connectors were created equal. I bought cheap, generic banana plugs, thinking they’d do the job, only to find my sound quality suffered and connections became loose over time. Trust me, not all banana plugs are built the same. Properly made ones, especially those designed for high-quality audio, can genuinely make a difference. For more details on selecting the best banana plugs, check out this comprehensive guide.
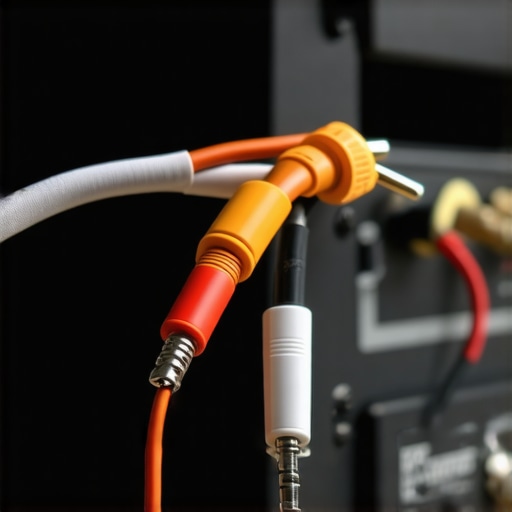
Much of the debate around speaker connections boils down to ensuring a solid, corrosion-resistant contact. Properly fitted banana plugs prevent oxidation that turns your wires green and sluggish. Plus, they make swapping out speakers or upgrading cables much easier—no more fumbling with exposed wires or risking shorts.
If you’re still on the fence, I’ll walk you through the top reasons why switching is well worth your time—and your money. We’ll also look at how to avoid common pitfalls like oxidized connections and signal loss, which can turn your high-end setup into a just-okay experience. Ready to take your audio game to the next level? Let’s dive into the reasons that convinced me to ditch loose wires for good.
Prepare Your Equipment for a Secure Connection
Before diving into installation, gather all necessary components: high-quality banana plugs, speaker wires, and a reliable power conditioner or surge protector. Ensure your workspace is clean and free of static or moisture, which can affect connections and equipment longevity. I once rushed into upgrading my speaker wires without clearing my workspace, resulting in tangled cables and a few minor sparks—an experience that underscored the importance of preparation.
Strip and Terminate Speaker Wires Properly
Use a wire stripper to carefully remove about half an inch of insulation from each conductor end. Twist the strands tightly to prevent fraying. This step, though seemingly simple, is crucial for ensuring a solid connection—that’s what prevents oxidation and signal loss. I once neglected this detail, leading to patchy sound and occasional dropouts. Taking this step meticulously guarantees a reliable link between your amp and speakers, akin to ensuring a tight seal on a pipe joint—no leaks, no interruptions.
Tip
Check the internal conductors for any nicks or damage. Damaged strands can cause shorts or increased resistance. Properly prepared wires will slide easily into banana plugs, making the next steps smoother. For detailed techniques, visit this comprehensive guide.
Attach Banana Plugs Securely to Wires
Insert the stripped wire end into the banana plug’s hole, then tighten the screw to lock it in place. Ensure no loose strands are sticking out—exposed strands can cause shorts or oxidation over time. It’s tempting to rush this, but a loose connection is equivalent to a bad handshake—trust is compromised early. I once left a few wires loosely secured, resulting in intermittent sound and frustration during listening sessions.
Pro Tip
Use a multimeter to test each connection’s continuity after attaching the plugs. This ensures there are no hidden faults. For high-fidelity setups, consider gold-plated banana plugs to resist oxidation, especially if your system is set up in humid environments. Explore here how to prevent oxidation effectively.
Connect to Amplifier and Speakers
Insert the banana plugs into the corresponding terminals on your amplifier and speakers—red to red, black to black. Make sure they click securely into place. This is the critical point where poor fit or mismatched connectors can cause signal loss or damage. I learned this the hard way when a loose connection led to a crackling sound that prompted an immediate inspection of all terminals, ultimately revealing a mismatched plug size that was replaced with better-fitting ones.
Extra Step
Label each wire and terminal to keep track of connections, especially in complex setups. This reduces confusion during future upgrades or troubleshooting. Reliable connections here are paramount; they’re the conduit for your high-quality audio signals and essential for an immersive listening experience. When in doubt, check out top tips for 2024 setup to refine your process.
Protect Your Investment with Power Conditioners
Plug your entire system into a power conditioner or surge protector to prevent damage from voltage spikes or surges. Unlike basic surge strips, quality power conditioners stabilize voltage and filter noise, which can interfere with audio clarity. I once ignored this advice and experienced a power surge that knocked out my amplifier—the repair cost was a wake-up call. Proper power management preserves your system’s integrity and ensures consistent sound quality.
Key Insight
Choose a power conditioner rated for your total load. Connect all your audio equipment to it, and avoid daisy-chaining multiple surge protectors, which can cause impedance issues. More details on this are available here.
Regular Maintenance to Extend Longevity
Periodically inspect your connections for signs of oxidation or looseness. Clean contacts with contact cleaner if necessary. Upgrading to banana plugs with corrosion-resistant plating makes maintenance easier and prolongs the lifespan of your setup. I recommend inspecting every six months, especially if your environment is humid. This proactive approach prevents issues before they manifest as degraded audio or component failure.
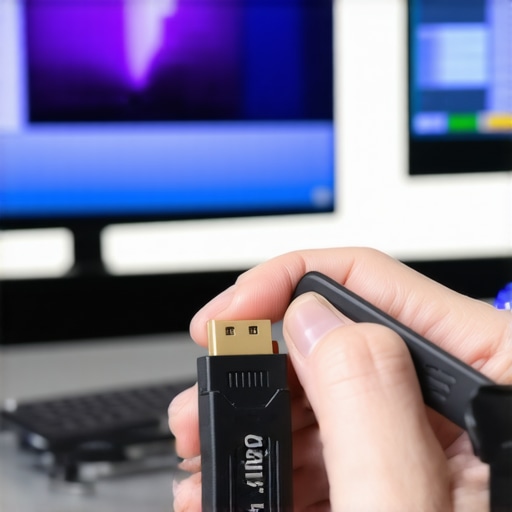
Even seasoned home theater enthusiasts often assume that simply choosing the latest HDMI 2.1 cable or a high-end surge protector guarantees optimal performance. **Let’s dig deeper**—there are nuanced pitfalls and misconceptions that can sabotage your setup, even if you’ve made what seem like perfect choices. For example, many overlook that not all HDMI 2.1 cables are created equal; some cheap cables claim to support 8K at 120Hz but fall short due to inferior shielding or poor manufacturing standards, which can cause flickering or lag. It’s a common myth that every HDMI 2.1 cable can handle the full bandwidth, but test results show that only certified cables deliver consistent high refresh rates without artifacts. Always check the specifications and look for reputable labels to avoid compatibility issues.
**Don’t fall into the trap of upgrading your power grid without understanding the nuanced difference** between a basic surge protector and an advanced power conditioner. Many buyers think a surge strip suffices, but recent studies from industry experts emphasize that power conditioners can filter out electrical noise, protecting sensitive components and preserving audio quality. Skimping here can lead to subtle hiss or signal degradation over time, which isn’t immediately noticeable but affects your listening experience. For in-depth insights on selecting the right power management, see this article.
**Here’s a sneaky mistake many make when choosing speaker wire**—assuming thicker wire always equals better sound. In reality, the gauge matters only relative to the length of the run and impedance considerations. Using excessively thick wire for short runs can be overkill and even hinder signal transmission due to increased capacitance. Conversely, marginally thin wire in long runs can cause resistance and loss, leading to duller sound. The key is matching wire gauge to your specific setup, not just opting for the thickest cable available. Learn more about this common error and how banana plugs can simplify safe, effective connections in your system.
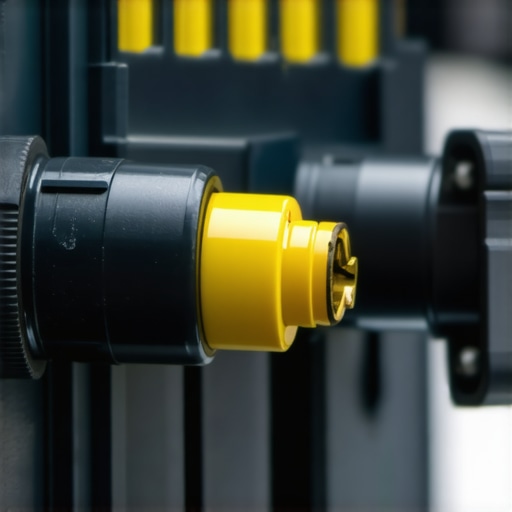
**What about banana plugs—are they all equally effective?** A frequent misconception is that any banana plug offers the same benefit, but quality varies widely. Cheap, unplated plugs may look similar but quickly oxidize, diminishing contact and causing intermittent sound. Advanced users understand that gold-plated banana plugs resist corrosion and ensure reliable conductivity over years of use. Moreover, proper insertion is crucial—loose plugs can produce crackles and even short circuits. If you want to maximize your investment, consider premium banana plugs designed specifically for high-fidelity audio, and always refer to expert tips like those found here.
**Advanced question to ponder**: How does your choice of cable shielding impact electromagnetic interference in sensitive AV setups? While DIYers might skip this layer, experts point out that shielded HDMI or speaker cables can substantially reduce noise pickup, especially in environments with dense Wi-Fi or radio signals. Studies from electrical engineering research confirm that electromagnetic interference can cause subtle distortions, which in turn degrade overall clarity. Therefore, investing in shielded cables and properly grounded power conditioners isn’t just about safety—it’s about preserving integrity in every note and pixel.
In summary, the devil is in the details. Upgrading to fancy gear won’t yield optimal results if you overlook these nuances—like verifying cable certifications, choosing the right power conditioner, matching wire gauge carefully, or selecting high-quality banana plugs. Taking a cautious, informed approach can elevate your home theater from good to exceptional. Have you ever fallen into one of these traps? Let me know in the comments, and stay vigilant for more expert tips to enhance your setup.Maintaining your high-end audio and video setup requires more than just choosing quality cables and components. Having the right tools at your disposal can make all the difference in ensuring long-term performance and safety. Personally, I rely on a few specific instruments that streamline maintenance and troubleshooting, allowing me to keep my system running optimally.
Invest in a Multimeter for Reliable Connections
A multimeter isn’t just for electricians; it’s an invaluable tool for audiophiles and home theater enthusiasts. I use mine to regularly test continuity on speaker wires and banana plug connections, confirming that signals are flowing correctly without resistance issues. A cheap multimeter from your local electronics store suffices, but opt for one with a digital readout to improve accuracy. This helps prevent common problems like oxidation-induced signal loss, especially in environments prone to humidity, which can accelerate corrosion (learn more here). When detected early, these issues are easy to fix before they impact your audio quality.
Why do I maintain my equipment with multimeters over time?
This simple step ensures continuous, reliable connections, saving you from intermittent sound or picture issues that can develop unnoticed. Regular testing provides peace of mind and extends the lifespan of your gear.
Use a Contact Cleaner for Clean, Corrosion-Free Contacts
Over time, oxidation can build up on metal contacts, impairing signal transfer. I personally apply a contact cleaner like DeoxIT to banana plugs and power connectors every six months. The process is straightforward: disconnect the component, spray a small amount on the contact surfaces, then insert and remove the plugs multiple times to distribute the cleaner evenly. This process keeps your connections shiny and oxidation-free, ensuring optimal signal quality and reducing noise that might otherwise cause subtle hissing or distortion. For best results, opt for cleaners specifically designed for electronic contacts (details here). Regular maintenance like this saves money and prevents major repairs down the line.
How do I maintain my audio connections over several years?
Periodic cleaning and inspection are key. Whether you’re using banana plugs or HDMI cables, keeping contacts free of corrosion preserves audio clarity and extends the life of your equipment.
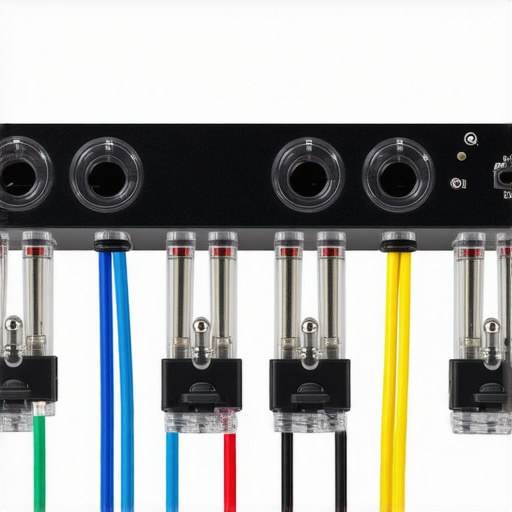
Consider a Cable Tester for Fast Troubleshooting
If you’ve experienced phantom signals or inconsistent video quality, a dedicated cable tester can quickly identify breaks or shorts. I own a simple yet precise tester that verifies the integrity of HDMI and speaker cables, saving me hours of guesswork. This is especially useful when upgrading or rearranging your setup, as it guarantees each connection is solid before powering everything on. A high-quality tester allows you to spot issues like damaged conductors or incorrect pinouts immediately, avoiding potential damage to your devices. You can explore models that connect via USB or standalone units, depending on your needs (see top picks here).
What’s the future of testing tools for home theater setups?
As more devices support HDMI 2.1 and 8K content, advanced testers equipped with digital diagnostics and network analysis will become standard, simplifying troubleshooting even further. Investing in these tools today prepares you for seamless upgrades in the future.
Ready to enhance your maintenance routine? I recommend starting by acquiring a reliable multimeter and contact cleaner. These tools are surprisingly affordable but incredibly effective at prolonging your system’s lifespan and ensuring consistent performance. Incorporate regular checks, and you’ll enjoy pristine audio and video for years to come. Keep your eye on emerging testing devices; they’re set to revolutionize how enthusiasts maintain their home theaters. Want more expert insights on optimizing your setup? Check out our comprehensive guides to power conditioners and HDMI cables to elevate your experience.
What I Wish I Knew When I Started Upgrading my System
- Switching to high-quality banana plugs was a revelation—simple yet transformative for sound clarity and connection durability.
- I underestimated the importance of proper wire stripping and securing—careful preparation saved me hours of troubleshooting later.
- Investing in a multimeter early on helped me detect oxidation and loose connections before they caused noticeable audio issues.
- Regular maintenance, like cleaning contacts and checking connections, prolongs system lifespan and preserves audio excellence.
- Understanding that not all HDMI 2.1 cables are created equal prevented me from chasing false promises of 8K support with cheap cables.
My Go-To Resources for Staying Ahead in Home Theater Tech
- The Comprehensive Guide to Speaker Wires and Banana Plugs: An absolute must-read for choosing the right connectors and ensuring good contact quality (check it out here).
- Effective Power Conditioners and Surge Protectors: These have saved me from costly power surges and noise interference, making my setup more reliable (learn more here).
- HDMI 2.1 Cable and Signal Integrity Guides: Critical for avoiding flickering or lag in high-resolution setups (dive into the details here).
Your Next Step Toward Exceptional Sound and Vision
Taking the time to understand these behind-the-scenes details can dramatically improve your home theater experience. Don’t be content with just buying the latest gear—invest in quality connections, proper tools, and regular upkeep. When you do, you’ll enjoy not only pristine audio and video but also peace of mind knowing your system is protected and optimized. Are you ready to implement some of these insights and elevate your setup to the next level? Share your experiences or questions below—let’s build a community of enthusiasts committed to excellence.
![Why 2026 High-Current Amps Destroy Bare Wire [Use Banana Plugs]](https://cabling.homeavreviewhub.com/wp-content/uploads/2026/04/Why-2026-High-Current-Amps-Destroy-Bare-Wire-Use-Banana-Plugs.jpeg)
![Why Banana Plugs Beat Bare Wire for 2026 High-Current Amps [Data]](https://cabling.homeavreviewhub.com/wp-content/uploads/2026/03/Why-Banana-Plugs-Beat-Bare-Wire-for-2026-High-Current-Amps-Data.jpeg)
Reading this post really resonated with my own experience upgrading my home theater setup. I used to think that just cheap banana plugs would suffice, but after a few months, I encountered intermittent crackling sounds and signal issues. Switching to high-quality, gold-plated banana plugs made a noticeable difference in both sound clarity and connection reliability. What surprised me most was how such a simple upgrade could improve the overall immersive experience. I also started using a multimeter regularly to check my connections, which helped me spot potential oxidation before it became a real problem. Ensuring all connections are both clean and tight seems obvious, but it’s easy to overlook when you’re busy enjoying the content. How do others in the community maintain their connections over time, especially in humid environments where corrosion might be more aggressive? Would love to hear some tips or tools that have worked well for you all.