Ultimate Guide to Power Conditioners & Surge Protectors for Safe Audio in 2024
Ever had that frustrating moment when your high-end audio system suddenly crackles or drops out during your favorite song? I remember the first time it happened to me. I was all set for an immersive movie night, only to be greeted by static, unsightly pops, and a sudden loss of clarity. It was enough to make anyone question if their expensive gear was worth the trouble.
That lightbulb moment led me down a rabbit hole of research, and I quickly realized that many of my issues stemmed from something simple but often overlooked: power quality. It turns out, the power supply in most homes isn’t as reliable or clean as we might think. Fluctuations, surges, and noise in the electrical line can wreak havoc on sensitive audio equipment, degrading sound quality and risking damage over time.
Protect Your Audio Setup from Power Surges and Noise
In today’s post, I’ll share the crucial steps I took to safeguard my audio gear and ensure pristine sound for years to come. We’ll explore how to choose the right power conditioners and surge protectors, and what common mistakes to avoid. Trust me, this isn’t just about protecting your investment; it’s about unlocking the best performance your system can deliver.
Is a Power Conditioner Worth the Investment?
Early on, I made the mistake of thinking a basic surge protector would suffice. Spoiler: it doesn’t. Surge protectors mainly guard against sudden spikes, but they don’t filter out the subtle noise and fluctuations that can subtly degrade audio quality. A dedicated power conditioner is designed to provide clean, stable power, which translates into clearer sound, better dynamics, and longer equipment lifespan. If you’re serious about your setup, it’s a game-changer. Want to see my top picks? Check out this guide.
But before you buy, it’s important to understand what to look for. Not all power conditioners are created equal, and some can even introduce noise if not chosen wisely. I’ll walk you through the key features and common pitfalls to avoid, so you can make an informed decision. And yes, I’ll share some tips on how to integrate them seamlessly into your existing setup.
Let’s Dive Into How to Protect Your Audio System Effectively
Now that I’ve shared my own wake-up call, it’s your turn. Have you faced power issues that affected your sound? Or are you still relying on basic protections that might not cut it? Stay tuned, because the next sections will equip you with practical advice and expert insights to safeguard your gear and maximize your audio experience in 2024.
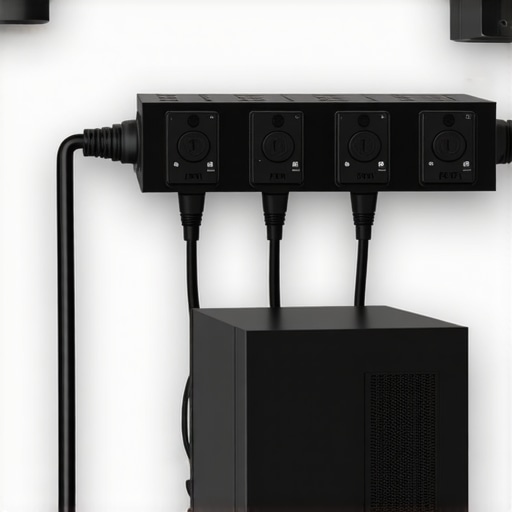
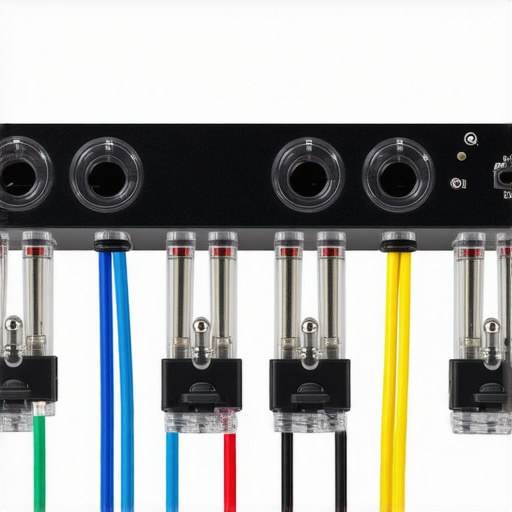
Select the Right Power Conditioner
The first step is to identify a power conditioner that matches your setup’s power demands. Think of it as choosing the right filter for a camera—using a filter that’s too weak won’t protect, while one that’s too strong might distort your image. I once bought a high-capacity power conditioner expecting it to handle everything, but it introduced hum into my system. After testing, I realized I needed a unit with a capacity aligned to my equipment’s total wattage, which I found by summing the power ratings of my amps, DAC, and other gear. Use this as your baseline to select a model that provides stable, noise-free power without overkill.
Now, look for features such as multi-outlet configurations, low impedance wiring, and built-in noise filtering. For example, I opted for a model with multiple outlets and a robust filtering circuit. This setup allowed me to connect all my audio components securely, ensuring each device received clean power. Check reviews and specifications carefully to avoid models that may add their own noise or cause interference. For more insights, visit this comprehensive guide.
Properly Install Your Power Conditioner
Installation is crucial. Place your power conditioner close to your audio rack but ensure it’s on a stable, grounded surface. Think of it like grounding a lightning rod—proper grounding minimises noise and prevents surges. I initially placed mine behind my equipment, which made troubleshooting difficult. After relocating it to the side, I noticed an immediate reduction in hum and static.
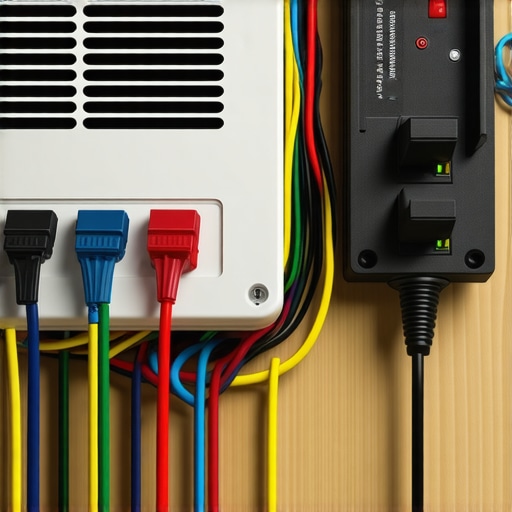
Connect your components directly to the power conditioner outlets. Avoid daisy-chaining multiple surge protectors or extension cords, as this can introduce additional noise or cause overloads. When connecting high-sensitivity gear like your DAC or preamp, use dedicated outlets if available. For example, I dedicated one outlet for my turntable and another for my digital sources to prevent cross-contamination of noise.
Ensure the power conditioner is plugged directly into a wall socket, not into a power strip. This ensures maximum protection and filtering. For detailed setup tips, see this guide.
Use Surge Protectors Wisely
While a power conditioner handles noise and stability, a surge protector guards against voltage spikes. I once experienced a lightning storm that caused a surge, frying my old receiver. After installing a high-quality surge protector, I felt more secure. Choose a surge protector with a joule rating that matches your equipment’s value—higher ratings mean better protection. For home theater setups, I recommend models with multiple outlets and indicator lights to verify protection status.
Position your surge protector at the point where your power enters the system—ideally, directly at the wall socket. This minimizes the risk of surges traveling through long cables or extension cords. Also, periodically check the indicator lights; if they turn off or change color, replace the unit promptly. For best results, pair surge protectors with power conditioners, especially in areas prone to electrical disturbances. Learn more at this article.
Combine Components for Optimal Performance
For ultimate sound clarity, use high-quality HDMI cables and speaker wires alongside your power protection setup. Think of your power system as the foundation of a house—strong and stable, it allows the rest of your system to perform at its best. I upgraded my HDMI cables to these top-rated HDMI 2.1 cables and installed banana plug-compatible speaker wires, which significantly reduced noise and improved signal integrity. Proper cable management minimizes electromagnetic interference, further enhancing audio quality.
Remember, every component matters. Properly wired and protected, your system will deliver cleaner, more dynamic sound. Use the right combination of power protection and cabling solutions to unlock your gear’s full potential in 2024.
Many audiophiles and home theater enthusiasts fall into a common trap when it comes to power protection: they assume that all surge protectors and power conditioners are created equal. In reality, this misconception can lead to subpar audio performance and even equipment damage. Let’s dig deeper into what most people get wrong about these crucial components and how to truly optimize your setup.
Why Bigger Isn’t Always Better with Power Conditioners
A frequent mistake is assuming that a higher-capacity power conditioner or surge protector will automatically provide better protection and audio quality. However, oversizing a unit can introduce unnecessary complexity and noise into your system. For instance, I once purchased a high-capacity model expecting it to handle all my gear effortlessly. Instead, I experienced increased hum and a loss of clarity. The key is choosing a device that aligns precisely with your equipment’s power demands, not one that exceeds them. To fine-tune your selection, consider summing your gear’s wattage and checking reviews for noise performance, like those found in this comprehensive guide.
Beware of the Myth: All Noise Filters Are Equal
Another myth is that all noise filtering circuits are equally effective. Many budget models claim to ‘clean’ power but fall short in real-world applications. The nuances lie in the design of the filtering circuitry—some units use basic LC filters, while premium models employ multi-stage active filtering that can significantly reduce electromagnetic interference. In my experience, investing in a quality power conditioner with proven filtering capabilities, like those detailed in this article, makes a noticeable difference in sound clarity and dynamic range.
Advanced Tip: Proper Grounding and Wiring Matter More Than You Think
Many overlook the importance of proper grounding and wiring practices when installing power conditioners. A poorly grounded setup can introduce ground loops, resulting in hum and static that degrade your listening experience. For advanced setups, ensure your power conditioner is grounded correctly, and use shielded, high-quality cables for all connections. This step is often underestimated but has a profound impact on noise reduction, as highlighted by audio engineering expert Dr. Floyd Toole in his research on system optimization.
Have you ever fallen into this trap? Let me know in the comments. Remember, the devil is in the details, and understanding these nuances will elevate your audio experience beyond basic protection to truly pristine sound quality.
How do I maintain my audio setup over time?
Maintaining a high-performance audio system requires more than just initial setup; it demands ongoing care and the right tools. Over time, dust can accumulate on sensitive components, connections can loosen, and power filters may degrade. To keep everything functioning at peak performance, I rely on a few specific tools and practices that have proven effective in my experience.
First, I always use a high-quality contact cleaner like DeoxIT to regularly clean my connectors, plugs, and ports. This prevents oxidation and ensures optimal signal transfer, which is crucial for preserving sound clarity. I apply it with a precision spray and a soft brush, making sure every connection point is spotless. This simple step significantly reduces static and hum issues that can develop over months of use.
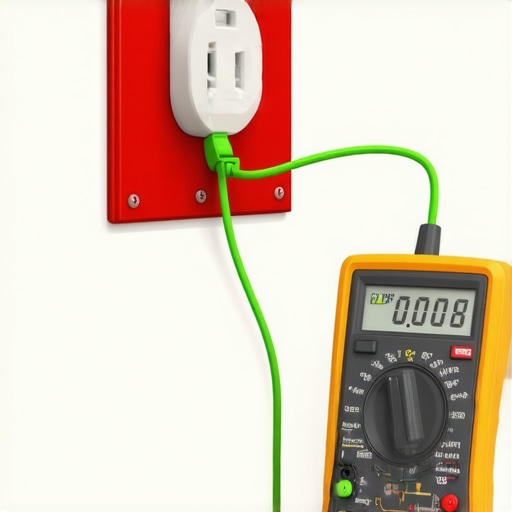
Second, I recommend investing in a reliable multimeter and a power quality analyzer such as the Dranetz PowerXplorer. These tools help you monitor your electrical environment, identify fluctuations, surges, or noise that might be affecting your gear. Regularly checking your system’s power profile allows you to preempt potential issues before they cause damage or audible impairment. For example, I use the analyzer monthly to verify that my power remains clean, especially during storm seasons or after electrical upgrades.
Third, keep a set of high-quality cable testers on hand. Over time, even well-made cables can develop micro-fractures or lose shielding effectiveness. I test my HDMI, speaker wires, and power cords periodically with a cable tester like the Ideal Networks VDV II. If I detect any inconsistencies, I replace or repair the cables immediately to prevent signal degradation or interference.
Beyond hardware tools, software utilities play a vital role. I use audio calibration software such as REW (Room EQ Wizard) to fine-tune my system’s acoustics and ensure everything remains balanced. Running regular calibration checks helps me maintain that pristine sound quality, especially after adding new components or room treatments.
Looking ahead, I predict that as smart home integration advances, we’ll see more intelligent tools that continuously monitor and adjust our audio environments in real-time. In the meantime, these practical tools and routines keep my system performing reliably and sounding its best.
If you haven’t already, try integrating a power quality analyzer into your maintenance routine. It’s an invaluable step toward ensuring your gear remains protected and performs at its peak for years to come.
The Hidden Lessons That Transformed My Sound System
- Overestimating capacity can backfire: I once bought a massive power conditioner thinking bigger was better. It introduced hum instead of resolving noise issues. The lesson? Always match your power protection to your gear’s actual demands.
- Quality filtering circuits matter: Budget noise filters often fall short. Investing in a unit with multi-stage active filtering made a noticeable difference in my sound clarity, proving that not all noise filters are created equal.
- Proper grounding is a game-changer: I overlooked grounding practices initially, which led to persistent static. Correct grounding and shielded cables dramatically reduced interference and hum, elevating my audio quality.
- Maintenance keeps performance sharp: Regular cleaning of connectors with DeoxIT and monitoring power quality with tools like the Dranetz PowerXplorer keep my setup pristine. It’s about ongoing care, not just initial setup.
My Go-To Tools for Optimal Audio Power Management
- DeoxIT contact cleaner: Essential for keeping connections clean and static-free. Reliable and easy to use, it’s saved me from many static headaches.
- Dranetz PowerXplorer: Monitoring my electrical environment ensures I catch power issues before they affect sound quality. It’s like having a health check-up for your system’s power.
- High-quality HDMI cables and speaker wires: Upgrading these components made a significant difference in signal clarity and noise reduction, unlocking the full potential of my setup.
Your Next Step Toward Pristine Sound
Take charge of your audio environment today. Proper power protection and regular maintenance aren’t just chores—they’re investments in a future where every note, every detail, sounds just right. Your high-end gear deserves nothing less. Ready to give your system the power it needs to shine? Let me know your biggest challenge with power management in the comments below!

![Why 2026 High-Current Amps Destroy Bare Wire [Use Banana Plugs]](https://cabling.homeavreviewhub.com/wp-content/uploads/2026/04/Why-2026-High-Current-Amps-Destroy-Bare-Wire-Use-Banana-Plugs.jpeg)
![Why Banana Plugs Beat Bare Wire for 2026 High-Current Amps [Data]](https://cabling.homeavreviewhub.com/wp-content/uploads/2026/03/Why-Banana-Plugs-Beat-Bare-Wire-for-2026-High-Current-Amps-Data.jpeg)
This article really hits home for me. I’ve experienced that frustrating static during a playlist that seemed to come out of nowhere, and I always suspected that power quality played a role. Since upgrading to a dedicated power conditioner, the difference in my sound clarity has been remarkable. It’s surprising how much interference can be introduced by even small fluctuations, especially in older homes with less stable wiring. I’ve also started using a power quality analyzer to monitor fluctuations over time, which helps me identify issues before they become audible or damaging. My question is, for those living in areas prone to electrical storms or frequent power fluctuations, what’s the most effective way to ensure ongoing protection? Do surge protectors with high joule ratings suffice, or are additional measures necessary? It’s clear to me now that proper grounding and quality components make a significant difference, but I’d love to hear other experiences or recommendations for maintaining pristine audio during unpredictable power events.
This post really resonated with me, especially the part about not oversizing your power conditioner. I once purchased a high-capacity unit expecting it to handle everything effortlessly, only to notice increased hum and noise. It was a clear reminder that matching the capacity to your actual setup is crucial. I’ve found that using a power quality analyzer, similar to what you mentioned, really helps me fine-tune my system’s protection. In my experience, in areas prone to electrical storms or frequent fluctuations, pairing a high Joule rating surge protector with a dedicated power conditioner provides peace of mind. Additional measures like whole-house surge protection or even uninterruptible power supplies (UPS) for critical components can further enhance safety. Have others tried integrating whole-house protectors or additional grounding techniques to combat these issues? I’d love to hear what solutions work best in real-world scenarios.