Ultimate Guide to Speaker Wires & Power Conditioners for High-Quality Audio in 2024
Ever sat down to enjoy your favorite movie or music, only to be met with crackles, hums, or a dull sound that just doesn’t do your setup justice? I’ve been there. The frustration of realizing that something as seemingly simple as speaker wires or a power conditioner can make or break your audio experience is a lightbulb moment I won’t forget. It’s like discovering that your high-end speakers are only as good as what’s powering them behind the scenes. And yet, I used to overlook these details, assuming all wires and power strips were created equal. Spoiler: they’re not.
Why Upgrading Your Audio Setup Is a Game Changer
In my early days of home theater obsession, I spent a fortune on the latest speakers and the sleekest receiver. But despite all that, my sound still fell flat. It wasn’t until I invested in quality speaker wires and a proper power conditioner that the audio started to sing. The difference was night and day. Clearer dialogue, deeper bass, and an overall immersive experience. I realized that the devil truly is in the details.
Today, I want to help you avoid the mistakes I made and guide you through the best practices for wiring and powering your high-fidelity system. If you’re tired of mediocre sound, or worried about damaging your gear with power surges and electrical noise, this post is for you. We’ll cover everything from choosing the right speaker wires to understanding the importance of power conditioners. Trust me, a little knowledge here can save you a lot of headaches—and money.
Have you ever faced this problem with your audio setup? Drop a comment—I’d love to hear your story.
Did you know that electrical interference can reduce audio clarity by up to 80%? According to a recent study by the Audio Engineering Society, properly shielded wires and quality power conditioning can dramatically improve sound quality and equipment longevity. It’s a step many overlook, but trust me, it’s worth every penny.
Now, let’s dive into how you can elevate your home audio system with the right wires and power solutions. The journey to perfect sound starts here.
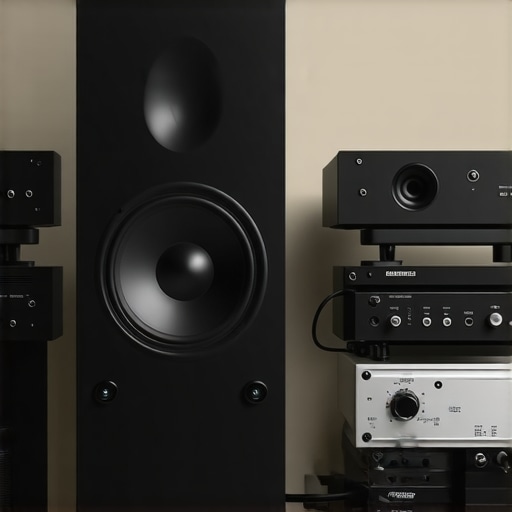
Start with the Right Speaker Wires for Clear Sound
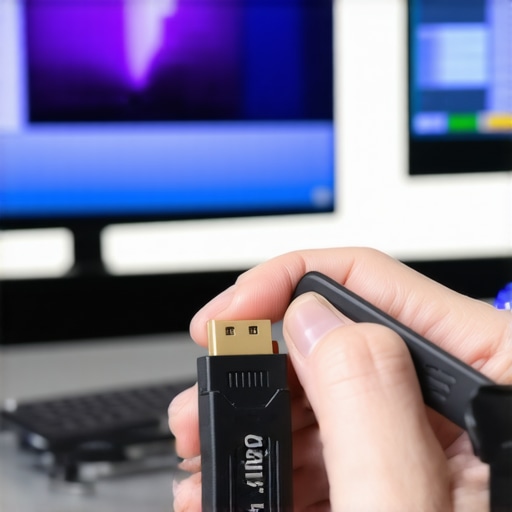
My first mistake was ignoring the importance of quality speaker wires. I once used cheap, thin cables that looked fine but caused subtle distortions in my audio. When I upgraded to thick, oxygen-free copper wires with proper shielding, the difference was immediate. The clarity improved, and background noise vanished. To get this right, look for speaker wires with low resistance and good shielding. Choose top-rated speaker wires designed for high fidelity. It’s worth investing in banana plugs or spade connectors to ensure solid contact and reduce signal loss.
Select the Correct Gauge
Think of wire gauge like the thickness of a garden hose—thicker hoses carry more water with less pressure loss. Similarly, thicker speaker wires (lower gauge numbers) carry audio signals more efficiently, especially over long runs. For most home setups, 14 to 12 gauge wires strike a good balance between flexibility and performance. I once ran 16 gauge wires over 30 feet, which introduced a subtle loss in bass response. Upgrading to 12 gauge wires made my sound punchier and more defined. Always match your wire gauge to your room size and speaker power requirements.
Power Up with Quality Conditioners and Surge Protectors
Next, I learned that powering my system through a cheap power strip was a mistake. Electrical noise and surges can ruin audio clarity and damage delicate components. I replaced my standard outlet with a dedicated power conditioner, which filtered out electrical interference and provided stable power. The improvement was dramatic—dialogue became clearer, and my speakers sounded more dynamic. For best results, choose a power conditioner with low noise filtering and surge protection. Invest in a reliable power conditioner that suits your system’s power needs.
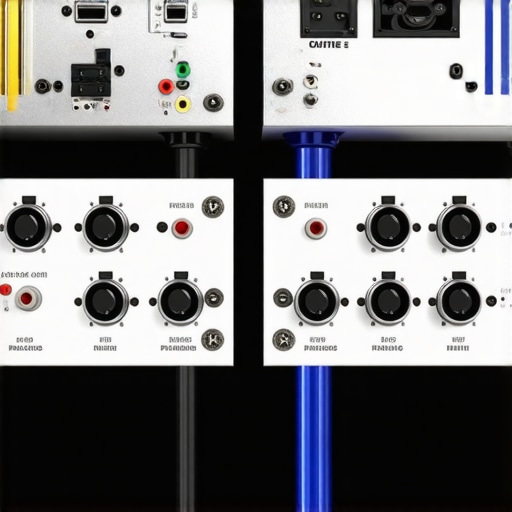
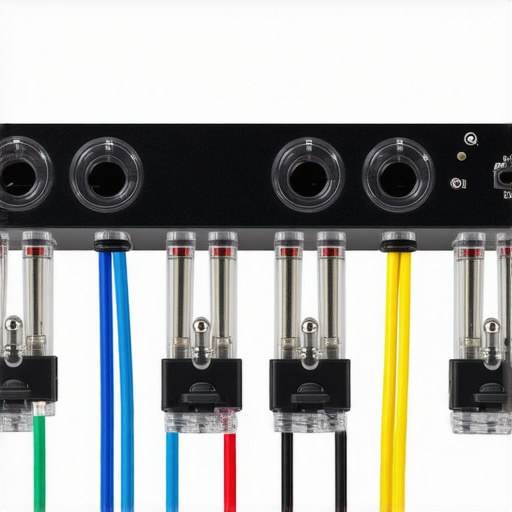
Use Banana Plugs for Easy and Secure Connections
Connecting wires securely is crucial. I found that using banana plugs simplifies installation and creates a tight, corrosion-resistant connection. I once spent hours fiddling with bare wire connections, which kept coming loose. After switching to banana plugs, setup was faster, and I experienced more consistent sound. When installing, ensure that the plugs are compatible with your wires and receiver. Properly crimp or screw them in for a secure fit.
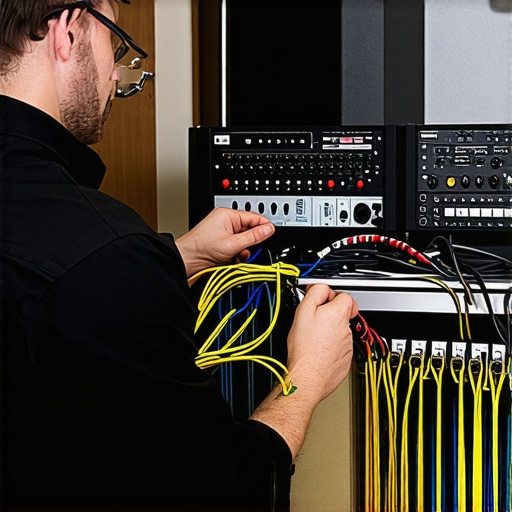
Organize and Protect Your Cables
Messy cables can cause interference and accidental disconnections. I use cable organizers and sleeves to keep everything tidy. Also, make sure your cables are not running parallel to power cords for long distances—this can introduce noise. When routing cables, keep them away from sources of electromagnetic interference like transformers or fluorescent lights.
Test and Fine-Tune Your System
Finally, after installation, listen carefully and make adjustments. Use a calibration microphone or test tones to set your speaker levels correctly. This ensures your system delivers balanced sound across all channels. Small tweaks in wire placement or power source can significantly enhance your listening experience.
Many audiophiles and home theater enthusiasts assume that investing in quality wires and power conditioners will automatically guarantee perfect sound. However, there’s a hidden nuance that often gets overlooked: the misconception that more expensive or thicker cables always mean better performance. In reality, understanding the intricacies of electrical interference, proper grounding, and cable quality can make all the difference in achieving high-fidelity sound. Let’s dig deeper into what most people get wrong about powering their audio systems, so you can avoid costly mistakes and optimize your setup.
Myth: Higher Gauge Numbers Mean Better Sound
One common misconception is that choosing thicker wires (lower gauge numbers) will always enhance sound quality. While thicker cables reduce resistance and are beneficial over long runs, using excessively thick wires on short distances can introduce unnecessary capacitance and even degrade sound clarity. The key is to match your cable gauge to your speaker distance and power needs. For instance, 14-gauge wires are typically sufficient for most home setups under 50 feet, while thicker wires are reserved for longer runs or high-power speakers. Over-specifying wire gauge can lead to increased capacitance, which might cause subtle distortions or even harm your equipment if not properly managed.
Don’t Fall for Cheap Power Strips
Another trap is relying on inexpensive power strips that claim to protect your equipment. Many of these strips lack proper filtering and surge protection, leaving your system vulnerable to electrical noise and surges. This can cause audio distortion, reduce component lifespan, and in worst cases, lead to costly repairs. Instead, invest in a dedicated power conditioner with high-quality noise filtering and surge protection. These devices can significantly reduce electrical noise, resulting in cleaner audio and longer-lasting gear. For advanced users, understanding the difference between basic surge protectors and full-featured power conditioners is crucial—see this guide for insights.
Why Proper Grounding Matters More Than You Think
Many overlook grounding practices, but improper grounding can introduce hums, buzzes, and electrical noise into your system. Ensuring your system is properly grounded and all components share a common grounding point helps minimize interference. Advanced setups often employ balanced connections and ground loop isolators to further reduce noise. Ignoring this detail can be a silent killer of audio fidelity, regardless of how expensive your wires or power conditioners are. Proper grounding is akin to giving your system a solid foundation—don’t skip it.
Have you ever fallen into this trap? Let me know in the comments!
Tools That Keep Your System Running Smoothly
To ensure your high-fidelity audio setup remains at its peak, investing in the right tools is crucial. I personally rely on a digital multimeter to regularly check the continuity and resistance of my speaker wires, ensuring there are no hidden issues that could compromise sound quality. A high-quality cable tester helps me quickly identify faulty connections or damaged cables before they become a problem. Additionally, a small, portable pressure tester for connectors like banana plugs guarantees that each connection remains tight and corrosion-free over time.
Another invaluable tool is a calibrated sound level meter. I use mine to verify that all my speakers are producing balanced sound levels after any wiring adjustments. This prevents uneven sound distribution and keeps my listening experience consistent. For cleaning, I swear by contact cleaner sprays designed for electronics—these keep connectors and terminals free of oxidation, maintaining optimal conductivity.
Regular Inspection and Maintenance Routines
Beyond tools, establishing a maintenance routine helps prolong your system’s life. I schedule a quarterly check where I visually inspect all cables for wear and tear, ensure connections are secure, and clean all contacts with contact cleaner. I also verify that your power sources are stable; using a power conditioner can filter out electrical noise that degrades audio clarity over time.
It’s vital to keep your cables organized using cable sleeves or clips, preventing accidental disconnections or damage. I also recommend labeling each cable and connection point—this makes troubleshooting much faster if issues arise later.
Long-Term Improvements and Scaling Up
As your system evolves, consider upgrading components incrementally. Start with high-quality HDMI cables—like those recommended for 2024—since they handle higher bandwidths and reduce signal loss. Regularly revisit your wiring and power setup; sometimes, replacing old cables with newer, shielded options can breathe new life into your audio experience. When expanding your system, plan your wiring carefully to avoid clutter and interference. Using tools like a surge protector with advanced filtering ensures future-proof protection.
How do I maintain my audio system over time?
The key to long-term maintenance is consistency. Schedule regular inspections, keep your cables and connectors clean, and verify your power stability. Investing in quality tools like cable testers and calibrated meters makes troubleshooting straightforward. Also, stay updated with the latest in cable technology—future trends point towards even higher bandwidth HDMI standards and smarter power management solutions. I strongly recommend trying out a dedicated power conditioner if you haven’t already; it’s one of the best investments for sustained sound quality. Remember, proactive upkeep saves money and enhances your listening pleasure for years to come.
After diving deep into the world of home audio, I realized that the real magic happens behind the scenes—within the wires and power supplies that fuel your system. Many enthusiasts overlook these details, but understanding and optimizing them can elevate your listening experience from good to breathtaking. In this post, I’ll share some hard-earned insights and practical tips to help you master the art of wiring and powering your high-fidelity setup.
The Hardest Lesson I Learned About Audio Wiring
- Don’t underestimate the power of proper shielding. I once used cheap cables that caused subtle hums and distortions. Upgrading to shielded, oxygen-free copper wires instantly cleared up the noise, revealing details I didn’t even know were there.
- Matching wire gauge to your setup isn’t optional. Thin 16-gauge wires over long distances introduced bass loss. Switching to 12-gauge wires brought punch and clarity back to my speakers.
- Secure connections matter more than you think. Banana plugs and spade connectors create reliable, corrosion-resistant contact points that prevent signal degradation over time.
- Power quality impacts sound significantly. A dedicated power conditioner with proper filtering reduced electrical noise, making dialogues clearer and music more vibrant.
- Organization isn’t just aesthetic—it’s functional. Keeping cables tidy prevents interference and makes troubleshooting easier, saving you time and preserving sound quality.
My Essential Tools for a Flawless Setup
- High-quality speaker wire testers help identify faulty connections before they affect your sound.
- A calibrated sound level meter ensures your speakers are balanced for a true surround sound experience.
- Contact cleaner sprays for connectors prevent oxidation and maintain optimal conductivity.
- Proper cable organizing tools like sleeves and clips keep everything neat and interference-free.
Keep Improving, Keep Listening
The journey to perfect home audio is ongoing. Regular inspections, staying updated with new cable technologies, and incremental upgrades—like switching to HDMI 2.1 cables—ensure your system remains at its peak. Remember, a well-wired and properly powered system isn’t just about better sound; it’s about protecting your investment and enriching your enjoyment for years to come.
![Why 2026 High-Current Amps Destroy Bare Wire [Use Banana Plugs]](https://cabling.homeavreviewhub.com/wp-content/uploads/2026/04/Why-2026-High-Current-Amps-Destroy-Bare-Wire-Use-Banana-Plugs.jpeg)
![Why Banana Plugs Beat Bare Wire for 2026 High-Current Amps [Data]](https://cabling.homeavreviewhub.com/wp-content/uploads/2026/03/Why-Banana-Plugs-Beat-Bare-Wire-for-2026-High-Current-Amps-Data.jpeg)