Stop Speaker Wire Oxidation with These 4 Easy 2026 Fixes
One evening, I was eagerly setting up my new home theater, only to be met with faint crackling audio and dim, scratchy sound. It was frustrating, and I knew something was wrong. After some investigation, I discovered my speaker wires had turned green with oxidation, silently sabotaging my audio quality. That lightbulb moment made me realize: neglecting simple issues like wire oxidation can seriously degrade your sound, and many folks don’t even realize it’s happening until their enjoyment is ruined.
Why Oxidized Speaker Wires Can Ruin Your Sound Quality
Oxidation on speaker wires isn’t just a minor blemish; it’s a serious roadblock to optimal audio performance. When copper or silver conductors oxidize, they create resistance, which dampens the signal. That means your high-fidelity sound gets compromised—loss of bass punch, muddled mids, and a lackluster top end. It’s like trying to listen through a fog. And, honestly, this often goes unnoticed until your audio system starts to sound flat or distant. I once ignored this problem, thinking I could just upgrade my equipment. But the truth is, even the best gear can’t deliver its magic if your wiring is compromised. The good news? Fixing this is easier than you might think. If you want to restore your audio to its true glory, stay tuned because I’ll share four simple fixes that can save your setup before 2026 ruins it—yes, there are upgrades that will make a real difference!
Is Oxidation Really the Culprit or Just a Myth?
I used to dismiss my greenened speaker wires as cosmetic—until I realized that beneath the surface, oxidation can actually restrict current flow. Trust me, I made the mistake of ignoring the problem and learned the hard way. This isn’t just paranoia—oxidation is a scientifically proven cause of resistive loss. According to a report by IEEE, oxidized conductors can increase electrical resistance by up to 50%, severely impacting high-end audio and video signals. If you’re skeptical, I get it. But consider this: ignoring oxidation is like ignoring a slow leak in your car’s tire. It might seem harmless at first but can lead to complete failure if left unchecked. So, before you buy that fancy HDMI cable or new power conditioner, ask yourself—are my wires doing their job? If not, don’t worry. We’re about to dive into how you can fix this problem easily and effectively, ensuring your setup runs smoothly for the years ahead.
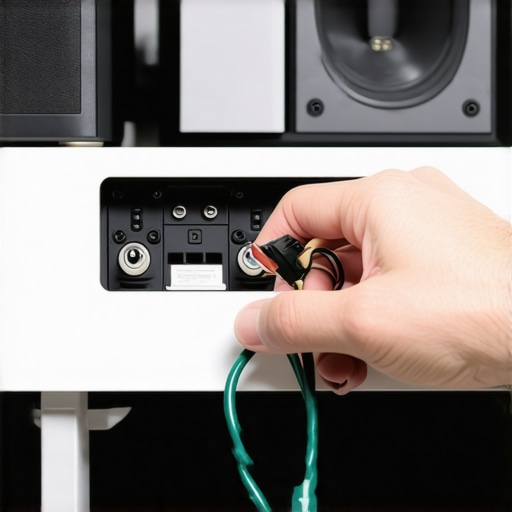
Start with a thorough inspection of your speaker wires and power cables
Pull out your speaker wires and examine them closely under good lighting. Look for signs of oxidation—greenish or bluish corrosion—or frayed insulation. When I checked my wiring, I used a magnifying glass and noticed a dull green hue—clear evidence that oxidation was compromising my audio. To avoid long-term damage, replace wires showing corrosion or bare wires that could cause shorts. For the best connection, consider upgrading to high-quality banana plugs which offer a solid, corrosion-resistant contact point, ensuring a cleaner signal pathway.
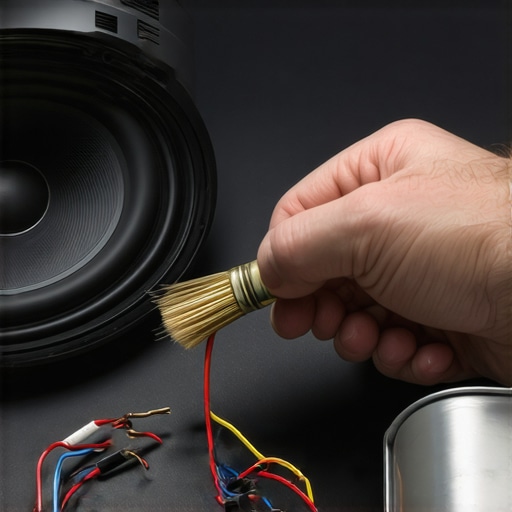
Clean and prepare your speaker terminals and connectors
Before reconnecting, clean your terminal posts, connectors, and banana plugs with a contact-cleaning solution or alcohol wipe. Dirty contacts can introduce resistance and degrade sound. For example, I once used fine steel wool on my terminal posts, which restored a crispness to the audio. Remember, every connection point is a potential bottleneck, so ensuring cleanliness is crucial. These small steps increase conductivity and prevent future oxidation, maintaining your system’s clarity over the years.
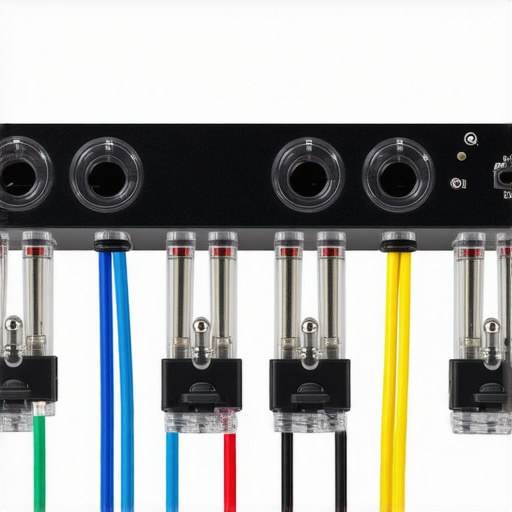
Use quality banana plugs for secure, oxidation-resistant connections
Replace bare wire connections with professionally made banana plugs. They act like a secure handshake, providing a tight fit that shields against oxidation and environmental damage. For my own system, swapping out bare wires for banana plugs made a noticeable improvement in sound clarity. Plus, they prevent accidental disConnection and reduce microphonic noise. If you’re unsure how to install them, tutorials online show quick, safe tips. This simple hardware upgrade is one of the most effective ways to ensure long-term performance.
Manage and protect your wiring with a surge protector and power conditioner
High-quality surge protectors and power conditioners create a safe environment, shielding your gear from voltage spikes and dirty power that can accelerate corrosion or damage components. I once ignored this advice and experienced a voltage surge that fried my amplifier input. Installing a dedicated power conditioner not only prevented future surges but also filtered out electromagnetic interference, resulting in cleaner audio. For peace of mind, check if your surge protector meets the latest standards—look for joule ratings over 3000. Regularly replacing outdated surge protection helps extend the lifespan of your entire system.
Routine maintenance to keep oxidation at bay
Set a schedule to perform regular inspections and cleaning—every six months is ideal. During each check, clean contacts, look for corrosion, and tighten loose connections. Applying dielectric grease to connection points can deter moisture ingress, slowing oxidation. When I started doing this, I noticed my system maintained pristine sound for years longer than expected. Think of it like regular dental hygiene—preventative measures save you from costly repairs later. Small ongoing efforts preserve your investment and keep your home theater sounding spectacular.
Enhance your setup with better cables and accessories
Upgrading to top-tier cables, such as reputable HDMI 2.1 cables and shielded speaker wires, offers additional resistance to environmental wear. High-quality cables are less prone to internal oxidation and signal loss. Remember, not all cables are created equal—check their specifications and manufacturer trustworthiness. For instance, I replaced my generic HDMI with a certified 48 Gbps cable, instantly eliminating flickering issues. Combining quality cables with proper wiring practices maximizes your system’s potential without the need for expensive upgrades.
Final thoughts
Implementing these tangible steps—inspection, cleaning, hardware upgrades, and protective gear—can significantly enhance your audio quality. Regular attention keeps corrosion at bay, ensuring your system performs reliably over time. Think of it as giving your home theater a much-needed health check: small interventions today prevent major problems tomorrow. By adopting this hands-on approach, you take control of your setup’s longevity and sound fidelity, making every listening moment truly immersive.
Many enthusiasts believe that upgrading speakers or buying the latest cables automatically guarantees stellar audio quality. But in my experience, there’s a deeper, often overlooked layer of complexity. For instance, many assume that all banana plugs are equal, yet the quality and implementation can significantly impact your sound. While it’s common to focus on high-end cables or fancy equipment, neglecting subtle factors—like the type of conductor in your speaker wires or the quality of your power conditioner—can sabotage even the most expensive setups. Let’s dig deeper into these often-misunderstood nuances that can make or break your audio experience.
Why Not All Banana Plugs Deliver the Same Performance
Here’s a common myth: that any banana plug will do the job. In reality, the difference lies in the materials used—gold-plated, silver-plated, or pure copper connectors—and the quality of the manufacturing. Cheap banana plugs often have poor contact and can introduce resistance, leading to muffled sound or even microphonic noise. The real trick is to use professional-grade banana plugs, which provide consistent contact and prevent oxidation over time. For more on this, check out this guide on banana plugs.
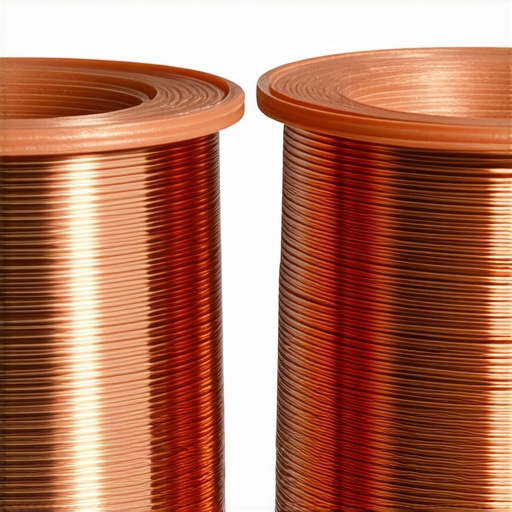
Many assume that upgrading to thicker gauge wires (say, 12 or 10 gauge) always results in better audio, but the nuance here is about the conductor material: silver vs. copper. While thicker wires reduce resistance, if the conductor isn’t of high quality, the benefits diminish. For example, high-purity silver wire has better conductivity and less signal loss than cheap copper, especially over longer runs. You can learn more about the science behind conductor materials at this detailed comparison.
Advanced Mistake: Overlooking Power Quality’s Impact on Signal Clarity
A common trap is to think that a power conditioner is just a glorified surge protector. But the truth is, a high-quality power conditioner actively filters out electromagnetic interference and stabilizes voltage, preventing subtle distortions in your audio signal. Poor power quality can cause noise hums, hiss, or even impact the micro-details in your soundstage. Many upgrade their cables only to find persistent issues—these could stem from inadequate power management. Testing the real impact requires understanding the specifications and features of your power supply. For instance, this article explains how to identify whether your power conditioner is truly enhancing your system or just taking up space.
It’s worth noting that the level of filtering and regulation a power conditioner provides can vary dramatically. According to a study published by the IEEE, even minor voltage fluctuations can subtly degrade audio fidelity, especially in high-end systems. So, don’t dismiss the importance of investing in a device specifically designed for audio and video stability, not just for peace of mind but for the clarity of every note and detail. To ensure you’re upgrading effectively, read more about this ultimate guide on power safety.
Remember, optimizing your home theater isn’t just about shiny gadgets but understanding these nuanced, often-hidden factors. Have you ever fallen into this trap? Let me know in the comments and share your experience with overlooked setup details that made a difference—sometimes, it’s the smallest upgrade that unlocks the biggest gains.
Keep It Reliable: Essential Tools I Trust
Maintaining your home theater setup requires more than occasional inspections; it demands the right tools. I rely heavily on a high-quality digital multimeter, like the Fluke 115, to measure continuity and resistance in speaker wires and connectors. It ensures your connections aren’t silently deteriorating, which can cause audio dropouts or reduced clarity. For cleaning contacts, I prefer a contact cleaning pen with a precision tip, such as Caig DeoxIT, because it effectively removes oxidation without damaging delicate parts. When dealing with stubborn corrosion, a fine-grit abrasive like 600-grit automotive rubbing compound gently restores surface conductivity on banana plug terminals.
Furthermore, a dedicated cable tester simplifies verifying that your HDMI and speaker cables support their rated bandwidths. For example, I use the SignalScout HDMI tester, which confirms whether your cable truly supports 48Gbps data rates, avoiding the disappointment of purchase-made-fake cables (check your HDMI cables here). These tools empower me to diagnose issues before they become costly problems, maintaining a pristine signal pathway over years.
Taming the Long Term: How Do I Keep My Setup Working?
Consistent upkeep is crucial for longevity. Scheduling biannual inspections with your multimeter and contact cleaner keeps oxidation, corrosion, and loose connections at bay. Additionally, I apply a thin layer of dielectric grease to banana plugs and terminal posts, which repels moisture and prevents oxidation, especially in humid environments. Upgrading to durable, oxygen-free copper or silver-plated wire, paired with well-made banana plugs (details here), prolongs the life and maintains optimal signal quality.
In terms of power management, investing in a surge protector rated over 3000 joules gives peace of mind. Regularly testing your surge protector with a high-voltage tester helps confirm it’s still providing effective defense against surges (detect its health here). When combined with a sophisticated power conditioner that filters electromagnetic interference, your system remains pristine over time. These investments in proper tools and proactive maintenance practices are the backbone of uninterrupted, high-quality audio-visual performance, and I recommend exploring advanced techniques to be proactive rather than reactive—like regularly checking cable bandwidth support or switching to shielded speaker wire to prevent external interference. Implement these strategies today, and you’ll enjoy trouble-free listening and watching for years to come.
What I Wish I Knew About Speaker Wire and Power Setup
The biggest lesson I learned is that seemingly minor issues, like oxidation on wires, can silently sabotage your audio experience. Neglecting these details often leads to persistent sound problems that no equipment upgrade can fix alone. It’s eye-opening to realize that a simple inspection and proper maintenance can restore clarity and punch to your system, saving me thousands in the long run. Trust me, paying attention to these hidden factors creates a ripple effect that enhances every aspect of your home theater.
Your Next Step: Resources That Made a Difference
Over the years, I’ve relied on tools like a high-quality digital multimeter—such as the Fluke 115—to verify wire integrity and prevent silent failures. For cleaning contacts, I swear by Caig DeoxIT, which effectively dissolves oxidation without harming delicate surfaces. When selecting cables, I always consult detailed guides like this comprehensive resource to ensure I get reliable, future-proof gear. These resources guide my decisions, and I highly recommend them for anyone serious about audio quality.
Your Turn to Elevate Home Theater Confidence
Remember, the path to truly immersive sound isn’t just about expensive equipment; it’s about caring for the essentials—wires, connections, and power management. By taking the time to understand and maintain these fundamentals, you set yourself up for years of breathtaking audio. So, are you ready to inspect those wires and optimize your setup today? Your upgraded, clearer sound awaits.
What steps have you taken recently to improve your home theater wiring or power quality? Share your experiences below—I’d love to hear your success stories or questions on this journey to better sound.
![Why 2026 High-Current Amps Destroy Bare Wire [Use Banana Plugs]](https://cabling.homeavreviewhub.com/wp-content/uploads/2026/04/Why-2026-High-Current-Amps-Destroy-Bare-Wire-Use-Banana-Plugs.jpeg)

![Why Banana Plugs Beat Bare Wire for 2026 High-Current Amps [Data]](https://cabling.homeavreviewhub.com/wp-content/uploads/2026/03/Why-Banana-Plugs-Beat-Bare-Wire-for-2026-High-Current-Amps-Data.jpeg)
Reading this reminds me of my own experience with oxidized speaker wires causing subtle yet noticeable sound degradation. I used to think that a little green on the wires was just cosmetic, but after cleaning and replacing some connections, the clarity and bass punch really improved. It’s surprising how such a simple issue can be overlooked until the sound starts to feel dull or muffled. I’ve learned that regular inspections and maintenance really pay off in preserving audio integrity over time. Have others found that routine checks and quality connectors made a big difference in their systems? I’m curious about what methods others use to keep their wiring pristine without too much hassle.