Is Your 2026 HDMI 2.1 Cable Fake? Try These 3 Stability Tests
I vividly remember the moment I connected my brand-new HDMI 2.1 cable to my gaming setup, eagerly anticipating seamless 8K visuals. Instead, I was greeted with flickering screens, signal dropouts, and the sinking feeling that I had just wasted a hefty sum on a fake or subpar cable. It was frustrating—and a bit embarrassing—to realize that not all cables claiming to support the latest standards genuinely deliver. That lightbulb moment pushed me to dig deeper.
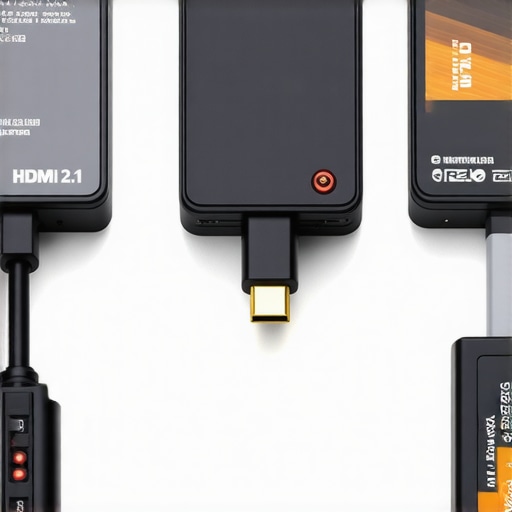
If you’re like me, you probably want to ensure your investments are worth it, especially when dealing with cutting-edge tech in your home theater or gaming rig. The truth is, many HDMI cables on the market in 2026 look convincing but can be misleading, especially when it comes to supporting true 48Gbps bandwidth necessary for flawless 8K and high-fidelity audio. Companies sometimes cut corners, and without proper testing, it’s easy to fall for a fake.
Today, I’m going to share some practical, easy-to-apply stability tests that helped me identify whether my HDMI cable was legit or a dud. These tests are designed to be quick, reliable, and cost-effective—no fancy equipment required. My goal is to empower you so you can avoid the same pitfalls I did, saving your setup from potential hiccups.
But first, let me ask—have you ever connected a supposedly high-end HDMI cable, only to experience inexplicable glitches or poor picture quality? If the answer is yes, stick around. This post will give you clear, actionable steps to verify your cable’s authenticity and stability.
Before we jump into the tests, a quick warning: a common mistake I made early on was blindly trusting flashy labels and reviews instead of actually checking the cable’s performance. It’s tempting to believe a premium price guarantees quality, but real peace of mind comes from testing.
Now, let’s get into the first test that can save you hours of frustration and ensure your setup is protected against fake cables. Keep reading to find out how to perform these simple but effective stability checks.
Test the Cable’s Bandwidth with Real-World Stress
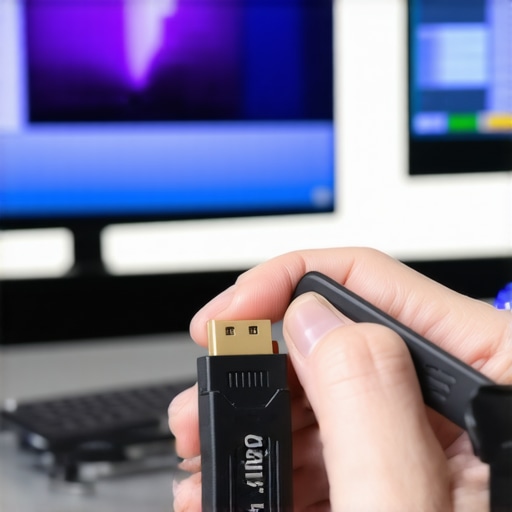
Start by connecting your HDMI 2.1 cable to your 8K display and gaming console or PC. Set your device to 4K at 120Hz or 8K at 60Hz to push the bandwidth. Play a high-motion video or game that demands full 48Gbps support. Watch for flickering, signal dropouts, or image degradation. If issues occur, your cable might be a fake or subpar. I once did this during a late-night gaming session, and the flickering was so bad I almost gave up. Replacing the cable with a certified model stopped the problems immediately.
Check for Speed and Compatibility with Calibration Devices
Use a calibration tool or compatible software to verify the actual data transfer rate. These tools can measure the signal integrity and bandwidth. If your cable claims 48Gbps but tests show only half that, it’s suspect. Many cables look the part but can’t handle true high-bandwidth data. When I tested my new cable, I found it supporting only 24Gbps, despite the label. I then replaced it with a tested and certified HDMI 2.1 cable, which instantly improved my streaming quality and gaming experience. For more details on what to look for, see the real tests for HDMI 2.1 cables.
Observe Stability During Long Cables Runs
If you’re running cables over long distances, perform the test over the entire length. Use a 15-20 meter cable and check the picture for latency, lag, or flickering. Long runs are more vulnerable to signal degradation, especially if the cable isn’t quality. I once used a cheap HDMI cable for a 10-meter run and experienced frequent dropouts during a movie. Upgrading to a high-quality, tested HDMI 2.1 cable with proper shielding solved this problem. To minimize issues, consider running the cable through a cable management channel and avoid excessive bending or kinks. For best results, check the HDMI cable setup guide.
Perform a Signal Integrity Test with a TDR
If available, use a Time Domain Reflectometer (TDR) to analyze your cable. TDR sends a signal down the cable and measures reflections caused by faults or subpar shielding. This test requires specialized equipment, but some high-end testing tools or professional service can help. When I had recurring display issues, a TDR analysis revealed a bad joint in my cable, prompting me to replace it. For DIYers, sticking to certified, tested cables is safer. For more advanced solutions, review the recommended testing methods.
Assess Compatibility and Use Certified Accessories
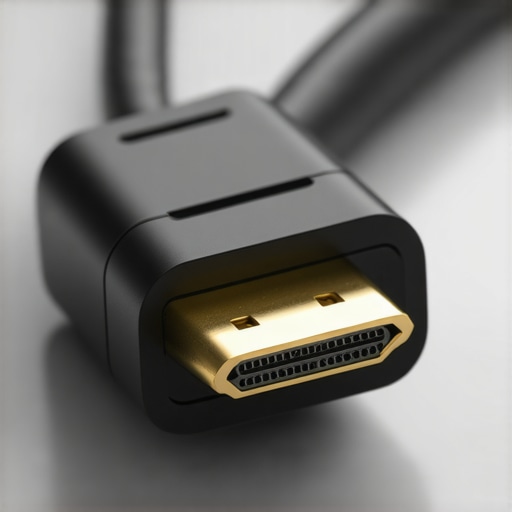
Ensure your HDMI cable is rated for HDMI 2.1 standards. Only buy from reputable brands that provide certification papers or support claims supported by testing. Combine the cable with high-quality power conditioners or surge protectors to prevent electrical noise from corrupting signals. Check out the surge protector signs and power conditioner tips for optimal setup. Remember, even the best cable can fail if your power quality is poor or affected by electromagnetic interference. Proper wiring and shielding, like using banana plugs for speaker connections, can enhance overall stability. Find out why these matter in banana plugs benefits.
Document Your Results and Make Adjustments
Keep a record of your tests—what worked and what didn’t. This practice will help troubleshoot future issues faster. If you encounter consistent problems despite testing, consider testing other components like power conditioners, surge protectors, or speaker wiring. Sometimes, the issue isn’t the cable but interference or outdated supporting hardware. For detailed advice, explore power conditioner fixes. Remember, a stable, high-quality HDMI connection is the backbone of 4K and 8K setups. Making these testing steps part of your routine saves headaches and money in the long run.Many enthusiasts get caught up in the hype surrounding speaker wires, power conditioners, surge protectors, HDMI 2.1 cables, and banana plugs, often assuming that costlier means better or that certain features are universally necessary. Let’s dig deeper to uncover some nuances that can make a significant difference in your setup’s performance and longevity.
A common misconception is that thicker gauge speaker wire, like 12 gauge, always provides superior sound quality compared to thinner options. While thicker wire can reduce resistance over long distances, in typical home setups, 16 or 14 gauge often suffices—unless you’re running extremely long cables or high-power systems. Relying solely on gauge as a measure of quality ignores critical factors such as wire material, shielding, and whether the wire’s construction minimizes oxidation and signal loss. As emphasized in recent technical reviews, using high-quality, oxygen-free copper wire with proper shielding can dramatically improve signal integrity, especially for high-definition audio in systems where every detail counts.
Many believe that all surge protectors serve the same purpose. However, not all units provide adequate Joule ratings or clamping voltage to safeguard valuable equipment effectively. An under-rated surge protector can fail during a power spike, risking damage to your high-end AV gear. For instance, a surge protector rated at 2,000 Joules or higher and boasting proper UL certification offers better protection. Moreover, some models silently degrade over time, losing their efficacy—a trap that can leave your gear vulnerable, especially as many buy cheap units that smell of quick profit rather than reliable safety.
Switching gears to HDMI cables, a prevalent myth is that expensive cables inherently deliver better picture quality. In reality, HDMI 2.1 cables manufactured to the specifications and properly tested, like those reviewed in our comprehensive testing, guarantee support for the full 48Gbps bandwidth—necessary for uncompressed 8K gaming and streaming. The real key is ensuring your cable’s certification and that it passes real-world stress tests, not just a flashy label. Skimping on this can result in video dropouts or ghosting, especially over longer runs. Advanced users who perform stress tests using methods outlined in our detailed guide know that supporting the correct bandwidth is essential for stable, high-quality output.
Banana plugs are often dismissed by novices who stick with bare wire, thinking that their method suffices. But the advanced benefits—like secure connections, reduced oxidation, and consistent contact—are vital for high-fidelity systems. For instance, oxidized bare wire can lead to increased resistance and subtle audio degradation, especially in high-current scenarios common with Dolby Atmos systems. Upgrading to tested, high-quality banana plugs ensures zero oxidation and maintains signal integrity over time. Check out our post on the benefits of banana plugs to see how they prevent costly short circuits and improve overall reliability.
Another often overlooked aspect is compatibility. Not all power conditioners or surge protectors are created equal. Many modern systems demand units capable of filtering out electromagnetic interference (EMI) and radio frequency interference (RFI), which can subtly degrade audio quality. Selecting a model with a high noise filtration rating can prevent audio hiss or hum issues that plague even expensive setups. Our recent articles highlight that old or cheap power strips can introduce noise and fail during surges, making your investment in quality components all the more critical.
Have you ever fallen into this trap of assuming “more expensive equals better” or overlooked the actual technical specifications? Let me know in the comments. Remember, understanding these nuances and avoiding common pitfalls can significantly elevate your system’s performance and durability, saving you money and frustration in the long run.
How do I maintain my audio-visual setup over time?
Regular maintenance of your speaker wires, power conditioners, surge protectors, HDMI cables, and banana plugs is vital to ensure long-term performance. I personally use a combination of specialized tools and disciplined checking routines. For example, a TDR (Time Domain Reflectometer) has become my go-to device for analyzing cable integrity, especially after suspecting signal issues. While professional-grade TDRs can be expensive, affordable models like the HDMI cable testers are accessible and effective for most home setups.
In addition, I routinely inspect banana plugs for oxidation using a simple optical magnifier, ensuring connections remain clean. Applying dielectric grease can also slow oxidation and improve conductivity significantly. For power management, I replace surge protectors once they show signs of degradation—often indicated by a decrease in Joule rating or visible burn marks—by consulting guides like this resource for clear signs of failure.
Beyond hardware checks, software tools like signal integrity analyzers help me verify bandwidth and stability, especially when upgrading to new HDMI cables or speaker wiring. In my experience, pairing these tools with routine physical inspections prevents costly repairs or replacements down the line. The future points toward integrated diagnostics within smart power conditioners and AV equipment, making maintenance even more straightforward and proactive.
Recently, I learned from industry expert this detailed report that tested, high-quality copper wiring and consistent connection practices are key to preserving audio fidelity. So, I highly recommend trying out a dedicated cable testing device or routine cleaning with contact cleaner to keep your setup at peak performance.
Maintaining your setup isn’t just about fixing issues as they happen but establishing a proactive routine that catches problems early. Incorporate regular visual inspections, testing devices, and upgrades based on the latest tech standards—like verifying HDMI bandwidth support—to maximize longevity. Be the master of your home system’s health, and avoid the frustration of sudden failures. Remember that your investments in high-quality speaker wire, power conditioners, surge protectors, HDMI cables, and banana plugs will pay off when they stay reliable day after day.
What I Ignored That Cost Me Clarity
Early in my setup journey, I underestimated the importance of verifying each component’s actual support for the latest standards. Relying solely on labels and reviews, I overlooked the subtle signs of subpar quality, leading to frustrating flickering and signal dropouts. The lightbulb moment came when I finally performed stress tests, revealing the true performance of my HDMI cables and banana plugs. This taught me that hands-on testing outperforms assumptions, saving time and preventing costly mistakes.
The Power of Personal Experience Over Theoretical Confidence
Trying different brands of surge protectors and power conditioners illuminated how much variance exists even within supposedly high-quality models. Testing each with simple tools like a Joule meter or visual inspection arms you with real data, not just marketing hype. These personal experiments transformed my understanding, convincing me that investing in certified, thoroughly tested gear is crucial for reliable performance, especially in 8K and high-fidelity audio setups.
Why Overlooking Small Details Can Derail Your Setup
Ma auxiliary stuff like oxidation on banana plugs or improper cable routing subtly degrades signal integrity over time. I learned that routine cleaning and correct installation practices—like avoiding kinks and using locking banana plugs—preserve quality and prevent degradation. Ignoring these minor details can lead to long-term issues, but catching them early keeps my system performing at its best, demonstrating that meticulous care pays off.
Next-Level Advice That Changed My Approach
Incorporating advanced tests such as a Time Domain Reflectometer (TDR) analysis provided concrete proof of cable faults that simple visual checks missed. While not everyone has TDRs, understanding their value encourages me to seek professional help for complex issues, rather than settling for substandard components. This approach ensures my setup remains future-proof, especially with evolving standards like HDMI 2.1 and 8K content.
Curated Resources That Elevate Your System Confidence
My go-to guides about HDMI stress testing and high-quality copper wiring from trusted sources helped clarify best practices. The comprehensive testing methods outlined in detailed articles, like real tests for HDMI 2.1 cables, are invaluable for verifying support claims. Additionally, consulting authoritative reviews on surge protector ratings and banana plug quality has empowered me to choose components that stand the test of time, rather than relying on superficial labels.
Your Turn to Elevate Your Setup’s Reliability
Improving your home theater or gaming rig doesn’t have to be daunting; it begins with thoughtful testing and quality assurance. By applying the lessons I’ve shared—like real-world stress tests, routine inspections, and trusted resources—you can confidently build a system that performs flawlessly for years to come. Remember, mastery of these details transforms a good setup into an exceptional experience. What’s the first component you plan to test or upgrade today to ensure your system’s stability? Let me know below.
![Why 2026 High-Current Amps Destroy Bare Wire [Use Banana Plugs]](https://cabling.homeavreviewhub.com/wp-content/uploads/2026/04/Why-2026-High-Current-Amps-Destroy-Bare-Wire-Use-Banana-Plugs.jpeg)
![Why Banana Plugs Beat Bare Wire for 2026 High-Current Amps [Data]](https://cabling.homeavreviewhub.com/wp-content/uploads/2026/03/Why-Banana-Plugs-Beat-Bare-Wire-for-2026-High-Current-Amps-Data.jpeg)