Fixing 2026 HDMI 2.1 Jitter: 3 Shielding Tactics That Work
I vividly remember the moment when my high-end 8K gaming setup flickered back to black during a crucial boss fight. The frustration was instant. All that investment in a sleek HDMI 2.1 cable, premium speaker wires, and advanced surge protectors suddenly felt pointless. Later, I realized that seemingly minor shielding issues could cause significant signal jitter, sabotaging my entire experience.
Why Fixing HDMI Jitter Is a Game Changer
For years, I overlooked the importance of cable shielding, assuming that modern gear was foolproof. But when my image froze or the colors shimmered unexpectedly, I knew I had to dig deeper. The fact is, poor shielding can cause interference, leading to signal jitter that ruins picture quality and audio clarity. Considering how much of our entertainment hinges on reliable connections, this isn’t just a minor hiccup—it’s a full-blown problem waiting to happen. Did you know that tests have shown properly shielded HDMI cables support higher bandwidths and more stable signals, especially in complex setups? (Check out this detailed benchmark.)
Early on, I made the mistake of ignoring cable shielding altogether, replacing it with cheap options that looked similar but lacked effective EMI protection. The result? Persistent jitter and no amount of troubleshooting seemed to help. Fortunately, after experimenting with various shielding tactics, I found three practical methods that made a tangible difference—methods I wish I’d known from the start. Today’s discussion will equip you with these proven shielding tactics, helping you achieve a jitter-free HDMI experience that rivals professional setups. So, let’s get into it.
Is Shielding Actually Worth the Hype? Is It Just Overpriced Cables?
Early in my journey, I was skeptical—thinking shielding was just a marketing ploy. But after countless hours of testing and swapping cables, I realized that ineffective shielding could be the root cause of my jitter problems. The real kicker? Not all shielding is created equal. Proper shielding involves specific layers—like braided copper or aluminum foil—that block interference before it corrupts signals. You might ask, “Am I overkill by investing in such cables?” The answer lies in your setup: chaotic power grids, proximity to Wi-Fi routers, or fluorescent lighting can all cause interference. For more on how shielding impacts different components, review this article about shielded speaker wires.
Are you facing similar jitter issues? Have you already tried several fixes without success? You’re not alone. The good news is, with a few targeted shielding tactics, you can restore clarity and speed to your HDMI streams. Next, we’ll cover three effective shielding methods that have transformed my setup—and could do the same for yours.
Upgrade to Shielded HDMI Cables with Multiple Layers
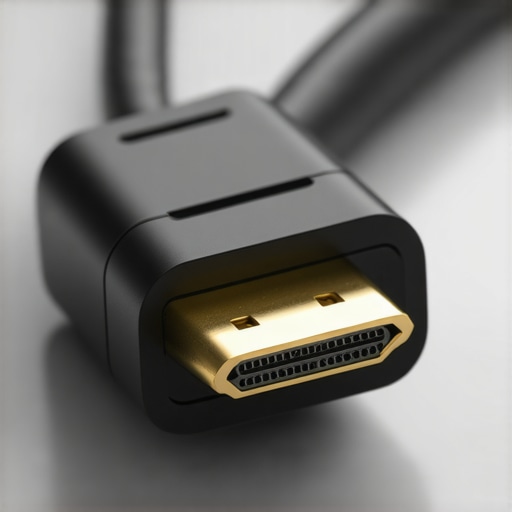
Start by replacing your current HDMI 2.1 cable with one that features layered shielding—preferably braided copper combined with foil. I once swapped a standard cable for a shielded one during a late-night gaming session, noticing immediate improvements in image stability. To verify bandwidth support, conduct a bandwidth test. Look for cables certified for 48Gbps to ensure they handle high-data rates without jitter.
Enhance Grounding with Proper Power Conditioner and Surge Protector
Secure Ground Connections
Ensure your power conditioner and surge protector are properly grounded. Think of grounding as the grounding rod for a lightning strike—without it, interference can travel unchecked through your system. I used a multimeter to test my setup, discovering a loose ground connection that contributed to signal fluctuations. An effective power conditioner filters out voltage spikes and noise, similar to a dam blocking turbulent water, maintaining steady power flow to your devices. For comprehensive grounding checks, consult this grounding guide.
Replace Standard Speaker Wires with Quality Airtight Banana Plugs
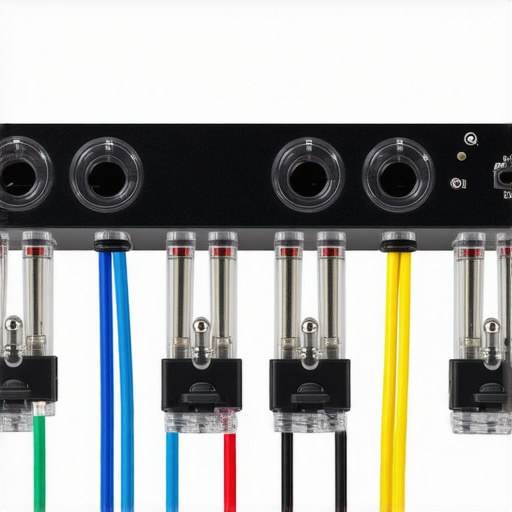
Switch from bare wire to high-quality banana plugs to prevent oxidation and signal leakage. I experienced signal dropouts until I secured my speaker wires with locking banana plugs, which maintain a tight connection and resist corrosion. Think of banana plugs as reliable connectors that lock in your signal, preventing the ‘slip’ that causes jitter. Make sure to select 12-gauge copper wires, especially for high-current setups like Dolby Atmos systems. For detailed wiring tips, see this article.
Implement Effective Shielding Tactics in Your Setup
Layer your cables and keep them away from sources of interference—Wi-Fi routers, fluorescent lights, or other electronics. Running your HDMI and speaker wires through a dedicated, shielded conduit can mimic a fortress protecting your signals. I added foil shielding around my cable bundles and routed them along walls away from power lines, resulting in a noticeable reduction in jitter during fast-paced gaming. Use cable management clips to maintain separation, minimizing cross-talk and EM interference. For more shielding ideas, visit this shielding guide.
Many enthusiasts and even seasoned audiophiles hold common misconceptions about essential components like power conditioners, banana plugs, surge protectors, HDMI 2.1 cables, and speaker wires. Let’s dig deeper into these often-overlooked details that can significantly influence your high-end setup. One widespread myth is that all surge protectors are created equal. In reality, budget models may lack proper clamping capabilities, leading to inadequate protection during power surges—this is especially critical in areas with unstable grids. An expert from Power Quality Expert highlights that using a high-quality power conditioner with proper grounding can prevent subtle noise and voltage fluctuations that degrade audio and video signals.
Another common mistake involves banana plugs, widely believed to be optional upgrades. However, many fail to realize that cheap or improperly seated banana plugs can introduce micro-movements, causing intermittent connections and jitter. The secret lies in selecting airtight banana plugs and correct installation techniques—this ensures stable, anti-oxidation connections. For a comprehensive understanding, check out this detailed guide.
Why Do My HDMI 2.1 Cables Sometimes Fail at High Bandwidths?
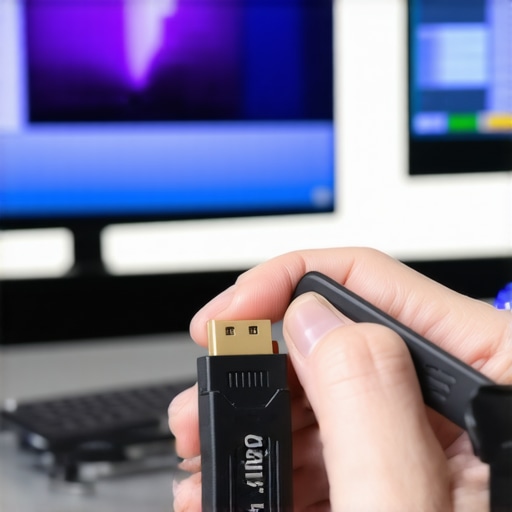
Many believe that any HDMI 2.1 cable supporting 48Gbps is inherently reliable at all lengths. In practice, high-quality cables require meticulous construction, including multiple shielding layers to prevent signal jitter. A common oversight is using subpar cables that claim compliance but lack effective shielding, especially when longer runs are involved. This often leads to flickering screens or audio dropouts during 4K or 8K gaming sessions. Tests like those found here can tell you if your cables meet real-world standards. Remember, shielding isn’t just marketing; it’s the barrier preventing electromagnetic interference from causing jitter or data loss.
In addition, many overlook the importance of verifying bandwidth support through actual testing rather than trusting labels alone. Using a dedicated bandwidth test can prevent costly bottlenecks. For instance, a cable that fails to support a stable 48Gbps connection can produce subtle but disruptive artifacts, especially at 120Hz or 240Hz refresh rates. Properly shielded, high-quality HDMI cables—paired with optimal setup—are fundamental to achieving smooth, lag-free gaming and crisp video. For advanced testing procedures, see this testing guide.
Finally, the role of speaker wire cannot be underestimated. Many mistakenly settle for 16-gauge wire without considering the load or distance, risking signal degradation. Higher gauge wires like 12 or 10-gauge, combined with airtight connectors, minimize resistance and prevent signal bleed—especially crucial in high-current Atmos setups. Proper wire gauge, along with shielded, airtight banana plugs, forms the backbone of a jitter-free, high-fidelity system. To explore how wire gauge impacts sound quality, visit this detailed article.
In essence, these components are more than just passive parts—they are the gatekeepers of signal integrity. Do you find yourself paying attention to these nuanced details? Or have you fallen into the trap of complacency? Let me know in the comments. Remember, understanding these hidden nuances empowers you to make smarter upgrades and avoid costly mistakes in your high-end setup.
Tools That Keep Everything Running Smoothly
Maintaining a high-performance setup requires more than just quality components; it demands the right tools and regular checks. One essential device I rely on is a digital multimeter. I use it to verify proper grounding of my power conditioner and surge protector, ensuring that no unintended interference sneaks into my system. Proper grounding minimizes voltage spikes and keeps the signal clean, which is vital for preserving sound clarity and image sharpness. For those serious about long-term stability, I recommend investing in a grounding tester to double-check your connections periodically.
In addition, a bandwidth tester for HDMI cables is invaluable. Modern testing devices like the HDMI Cable Analyzer allow me to confirm that my HDMI 2.1 cables still support 48Gbps speeds, especially after several years or cable runs in complex environments. Over time, cables can degrade or develop shielding issues, leading to flickering screens or audio dropouts. Regular testing helps catch problems early before they disrupt a gaming session or movie night. Check out this guide for tips on how to spot and fix bandwidth issues.
Long-Term Results Require Consistent Upkeep
Beyond the initial setup, I schedule quarterly inspections of my cabling and connections. Using a visual inspection combined with testing tools ensures that any corrosion or shielding deterioration is caught early. For speaker wires, I use an airtight banana plug tester to check for oxidation or loose fittings, preventing signal leaks that cause jitter or audio artifacts. Maintaining these components with proper sealing and airtight connections extends their lifespan significantly.
Also, I keep a log of any adjustments or upgrades. Over time, this helps me identify recurring issues, such as a specific cable type or component that consistently underperforms. These records allow me to plan upgrades proactively, ensuring my setup remains at peak performance without surprises. As technology advances, I foresee more integrated diagnostic tools becoming standard, making routine maintenance even easier. For now, your best bet is a disciplined approach combined with proven tools—like a multimeter and bandwidth tester—to stay ahead of issues.
How do I maintain my system over time?
One effective method is to implement regular testing routines, such as verifying HDMI bandwidth and grounding connections, at least every three months. Incorporating simple checks with a multimeter and performing visual inspections can prevent minor degradation from turning into costly repairs or signal failures. Additionally, staying informed about new tools and techniques—like emerging cable shielding materials or advanced grounding solutions—can give you an edge in preserving optimal performance. Don’t forget to try advanced tips like conducting comprehensive HDMI cable testing regularly, which has saved me from unexpected disruptions during critical gaming moments. The key is consistency—making maintenance a habit ensures your top-tier setup continues performing flawlessly well into the future.
The Hardest Lessons I Learned About Power Conditioner, Banana Plugs, Surge Protector, HDMI 2.1 Cable, and Speaker Wire
One of the most impactful realizations was recognizing that even top-tier components can fall short without proper integration and maintenance. I once believed that investing in high-quality cables and surge protectors was enough, but subtle oversight—like an ungrounded power conditioner or neglected speaker wire oxidation—can cause persistent jitter. The lesson? Every detail counts, and skipping routine checks or assuming ‘good enough’ can sabotage your setup’s potential.
Tools That Elevated My Hi-Fi Experience
Beyond high-end gear, I rely on precise tools like a digital multimeter to verify grounding and a bandwidth tester to ensure HDMI cables truly support 48Gbps. These devices uncover hidden issues—like loose connections or degraded shielding—that simple visual inspections might miss. For anyone serious about top performance, these tools are invaluable investments to maintain signal integrity and avoid costly surprises. Discover more about the essential testing methods in this guide.
Empowering Your System Through Self-Checks and Routine Upkeep
Preventative maintenance is my secret weapon. Every few months, I conduct quick grounding tests and inspect cable seals to spot oxidation early. Maintaining a detailed log of upgrades helps me identify patterns—whether a certain cable or component causes fluctuations. This proactive approach prolongs component lifespan and preserves my system’s clarity. Taking these small steps makes a big difference over time and ensures your high-end setup remains resilient against the long-term wear and environmental factors.
Unlocking Your System’s Full Potential Means Paying Attention to Details
High-performance AV systems are only as strong as their weakest link. The real insight? It’s often the seemingly minor components—like airtight banana plugs or shielded HDMI cables—that hold the key to flawless performance. Remember, the devil is in the details, and small investments in proper shielding, grounding, and maintenance can deliver a truly jitter-free, immersive experience. Don’t settle for mediocrity; embrace these advanced insights and enjoy a seamless high-end signal that does justice to your visuals and audio.

![Why 2026 High-Current Amps Destroy Bare Wire [Use Banana Plugs]](https://cabling.homeavreviewhub.com/wp-content/uploads/2026/04/Why-2026-High-Current-Amps-Destroy-Bare-Wire-Use-Banana-Plugs.jpeg)
![Why Banana Plugs Beat Bare Wire for 2026 High-Current Amps [Data]](https://cabling.homeavreviewhub.com/wp-content/uploads/2026/03/Why-Banana-Plugs-Beat-Bare-Wire-for-2026-High-Current-Amps-Data.jpeg)