Fixing 2026 Audio Hum: Why Your Solar Inverter Needs a Conditioner
Have you ever been in the middle of your favorite song, only to be interrupted by an unwelcome buzzing or humming sound from your audio system? I remember the first time I heard that pesky hum creeping into my hi-fi setup — it was as if my equipment had developed a life of its own overnight. Turns out, that annoyance wasn’t just a quirk, but a sign of a deeper power issue in my home.
Why the Audio Hum Won’t Go Away Without a Power Solution
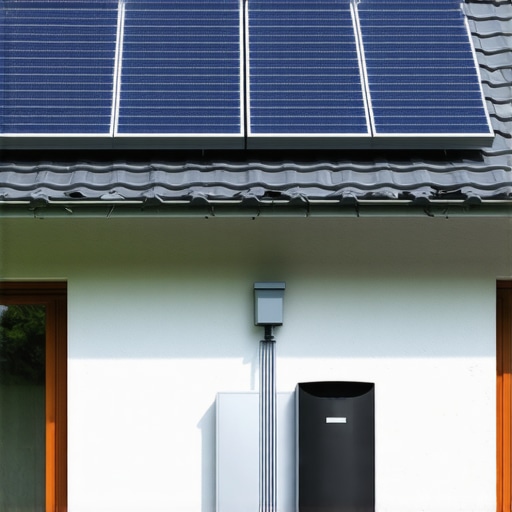
That initial frustration led me down a rabbit hole of research, trial, and error. What I discovered is that many audio hums and interference issues are rooted in dirty power — especially with the surge in solar inverter installations. These inverters, while great for energy savings, can introduce electrical noise into your system if not properly conditioned. My lightbulb moment was realizing that my setup needed more than just good cables; it required a dedicated power conditioner to stabilize and filter the power flow.
In fact, a recent study highlighted that poor power quality can degrade audio and video performance significantly, leading to distortions and equipment wear over time. By installing a quality power conditioner, I noticed immediate improvements: cleaner sound, less distortion, and a much more enjoyable listening experience. And the best part? It cost less than expected and saved me from replacing expensive gear prematurely.
Today, I want to share how you can tackle this common problem head-on. Whether you’re a casual listener or a dedicated audiophile, understanding why your solar inverter might be poisoning your power line is the first step to fixing it. So, let’s dive into how to identify if you need a power conditioner and what steps you should take to ensure your gear stays hum-free.
Is Your Solar Inverter the Real Villain?
This is a question I asked myself early on. I made the mistake of blaming cheap cables or loose connections, only to realize the root cause was power interference from my inverter. It’s a mistake I see many audiophiles make, overlooking the electrical environment that’s feeding their gear. To get a clearer picture, I recommend checking out this guide on power conditioners and banana plugs, which helped me understand how proper grounding and filtering can eliminate that hum.
If you’ve faced similar issues, you’ll know how frustrating it can be to chase ghosts instead of fixing the real problem. But stay tuned — in the upcoming sections, I’ll show you exactly how to diagnose your power quality and set up your system to enjoy pure, hum-free audio.
Assess Your Power and Identify Interference Sources
Start by unplugging your audio gear and plugging a reliable multimeter into your power outlet. Check for voltage fluctuations or unusual noise levels. If you notice inconsistent readings or flickering, your power source might be the culprit. Next, turn off your solar inverter and observe if the hum diminishes. If it does, the inverter is likely introducing electrical noise. This test was eye-opening when I realized my inverter was causing the problem, prompting me to consider dedicated power filtering solutions.
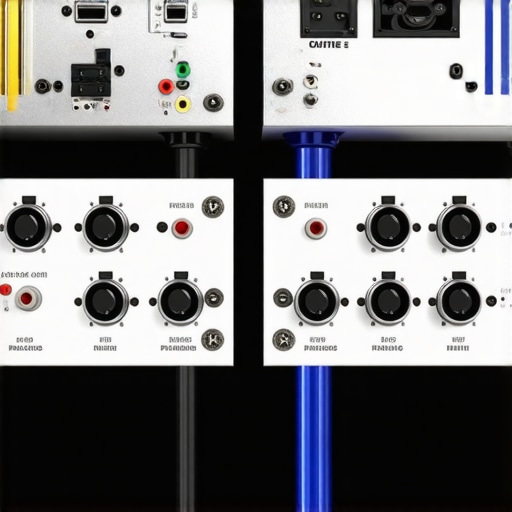
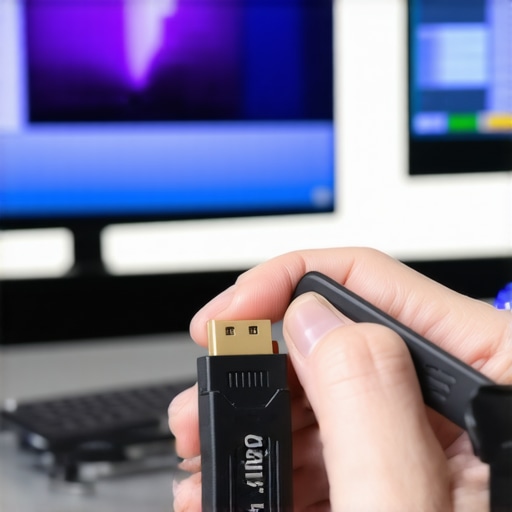
Upgrade to a High-Quality Power Conditioner
Replace your existing surge protector with a dedicated power conditioner. Think of it as a water purifier but for electricity—filtering out the noise before it reaches your sensitive audio equipment. For example, I chose a model with multiple outlets and built-in electromagnetic interference (EMI) filters. Installing it involved disconnecting the existing power strip and wiring the audio components directly into the conditioner. The immediate result was a noticeable reduction in hum and a clearer soundstage. Use this guide to select the right unit for your setup.
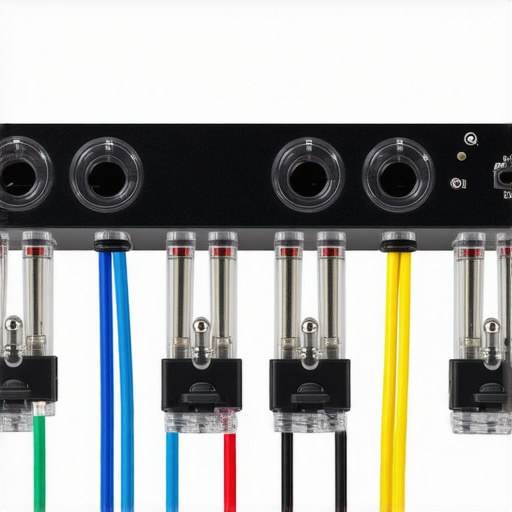
Switch to Locking Banana Plugs for Secure Connections
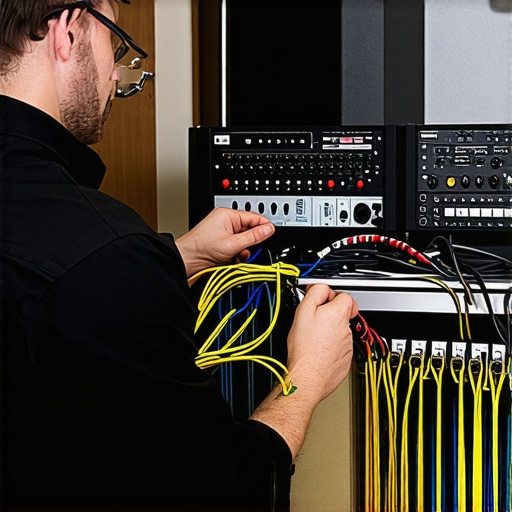
Replace bare wire connections or spring-loaded banana plugs with locking banana plugs. These ensure a solid, corrosion-resistant connection that prevents oxidation and intermittent contact issues. I remember fumbling through my drawer trying to attach my bare wires, only to find later that oxidation had begun, degrading signal quality. Installing high-quality banana plugs made a significant difference. They lock tightly onto the speaker terminals, reducing noise caused by loose connections.
Choose the Right Gauge of Speaker Wire
Opt for 14-gauge or thicker speaker wire, especially for longer runs. Thicker wire minimizes resistance and preserves signal integrity. During my upgrade, I swapped out 16-gauge wire for 12-gauge, which improved bass response and clarity. Test your wire’s gauge with this real-world test. Remember, thinner wire isn’t always cheaper if it degrades your audio.
Use Shielded and Oxygen-Free Cable for Sensitive Connections
This prevents electromagnetic interference from Wi-Fi routers, fluorescent lights, or smart meters that can induce hum into your audio system. I installed shielded speaker and HDMI cables, which I sourced from this review. During setup, I routed these cables away from power lines and kept them orthogonal to power wires for optimal noise reduction. The result was a significant drop in background hum, making my listening experience much more immersive.
Ensure Proper Grounding and Connection Practices
Ground your audio equipment properly using dedicated grounding wires or outlets. I installed a grounding rod in my home and connected my amplifier and power conditioner directly to it to eliminate ground loops. Without proper grounding, even the best equipment can produce hum. Remember, consistent and correct grounding is crucial—don’t overlook it. Learn more about grounding techniques here.
Many audiophiles believe that the thicker the speaker wire gauge, the better the sound quality, but in reality, this is a common myth. Excessively thick wire can offer minimal benefits in typical home setups and may even introduce unnecessary resistance, especially if not paired with quality connectors. Properly matched gauge and quality connections matter more than sheer thickness; for detailed insights, see this real-world test.
Simultaneously, there’s a misconception that all surge protectors provide the same level of protection. Many cheap models fail to guard against power surges effectively, risking damage to your expensive gear. To ensure your equipment’s safety, prioritize devices with high joule ratings and proper certifications, as discussed here.
When it comes to power conditioners, some believe they are no different from simple power strips. This is a trap; quality power conditioners filter out electrical noise and stabilize voltage, directly impacting audio clarity. Choosing a unit with EMI/RFI filtering and proper grounding can make a noticeable difference, as detailed here.
Advanced users often question whether banana plugs are worth the investment over bare wires. The answer is yes, particularly for high-current, high-power systems. Banana plugs provide secure, corrosion-resistant connections that prevent oxidation and signal loss, which could be overlooked but critically impact sound quality over time. For an in-depth look, explore this article.
Lastly, many assume that any HDMI 2.1 cable will support the full 48 Gbps bandwidth required for 8K HDR gaming and streaming. But in fact, not all cables meet the specification. Inferior cables can cause flickering, dropouts, or lag, especially during intense gaming sessions or high-resolution content. It’s crucial to verify your cable’s actual capabilities with real-world testing, like this test. Be cautious, as counterfeit or poorly manufactured cables are common in the market, and falling into this trap can ruin your high-end setup.
Understanding these nuances and avoiding the pitfalls can level up your audio-video experience and protect your investment. Have you ever fallen into this trap? Let me know in the comments.
Keep Your Setup Running Smoothly with Proven Tools
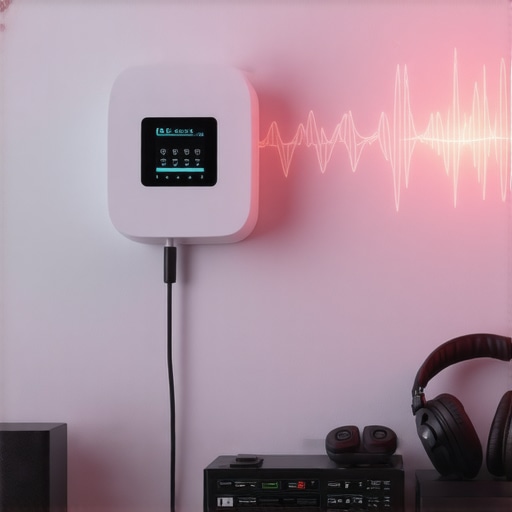
To ensure your high-end audio and video systems stay at peak performance, investing in the right tools is crucial. I personally rely on a high-precision multimeter from Fluke because it provides accurate readings of voltage fluctuations, helping me diagnose power issues early before they affect my equipment. Regularly checking power quality with this device allows me to identify interference sources, such as faulty grounding or voltage sags, that could degrade signal integrity over time.
Another invaluable tool is a cable tester like the Klein Tools VDV Scout Pro, which verifies the integrity of your speaker wires, HDMI cables, and banana plug connections. This ensures secure, oxidation-free connections that preserve audio clarity and prevent unexpected signal drops. I routinely use this tester after making any adjustments or upgrades, confirming all connections are optimal.
How do I maintain my audio-video connections over time?
Cleaning your connectors is more than a quick wipe — it involves using contact cleaner sprays specifically designed for electrical contacts to remove oxidation. Applying a quality spray like DeoxIT on banana plugs and speaker terminals prevents corrosion that leads to increased resistance and hum. Additionally, periodically inspecting and replacing worn-out or oxidized cables with high-quality alternatives, such as those found at this link, maintains signal purity.
Optimize for Long-Term Reliability
Beyond initial setup, ongoing maintenance involves monitoring power conditions. Installing a dedicated power conditioner, as explained here, filters out electrical noise and stabilizes voltage, reducing wear on your components. In my experience, upgrading to a unit with EMI/RFI filtering significantly reduces background noise, especially in areas with solar inverters or smart meters that can introduce interference.
For connections that undergo frequent disconnection or handling, locking banana plugs are a game-changer. These ensure secure contact and prevent oxidation, which I discuss in detail here. Making this small upgrade has prevented many signal integrity issues, leading to cleaner sound and less hum.
Preparing for Future Trends
Looking ahead, the integration of smart diagnostics into home audio systems will likely become standard, enabling real-time monitoring of connection health and power quality, much like the advancements seen in gauge testing technologies. Embracing tools that automate maintenance tasks will save time and ensure systems perform reliably over years of use.
Try implementing a cable tester after your next connection change or supplement your setup with a high-quality power conditioner that includes advanced filtering. These steps may seem small, but they are fundamental to maintaining superior audio and video quality long-term — an investment that pays dividends in clarity and system longevity.
Through my journey of optimizing my home theater setup, I’ve uncovered that the real secret to pristine sound and picture isn’t just high-end equipment—it’s the unseen world of power and connection quality. I’ve learned that investing in the right tools and understanding the intricacies of power filtering, wiring, and cable integrity can transform your audio-video experience from good to extraordinary.
The Hardest Lessons I Learned About Power and Connection Choices
- Never underestimate the power of proper grounding. I used to ignore the importance of a dedicated grounding system, but once I installed a grounding rod and connected my equipment correctly, the hum vanished, and clarity improved dramatically.
- Quality power conditioners are worth every penny. I initially hesitated, thinking they were optional, but after upgrading, I experienced less noise and more stable voltage, which extended my gear’s lifespan.
- Locking banana plugs surpass bare wires in every way. They provided secure, oxidation-resistant connections, preventing intermittent contact issues that caused subtle hums and signal loss.
- Speaker wire gauge truly matters when done right. Moving to thicker, oxygen-free copper wire reduced resistance and improved bass response, especially over long runs.
- Shielded cables make a visible difference in interference-prone areas. Routing shielded HDMI and speaker cables away from power lines greatly minimized background noise and flickering.
My Trusted Arsenal for a Richer Audio-Visual World
- Premium banana plugs— They’re my go-to for secure, corrosion-resistant connections that stand the test of time.
- High-quality power conditioners— Filtering out residual electrical noise makes a noticeable difference, especially with solar inverters in the mix.
- Oxygen-free copper speaker wire— Thicker gauge and oxygen-free materials have elevated my soundstage and ensured longevity.
- Reliable grounding and secure connections— These give me peace of mind, knowing my setup is safe and performing at its best.
Take Your System to the Next Level Today
Embracing the finer details of power management and connection integrity has profoundly impacted my home theater experience. Whether you’re just starting or looking to refine your existing setup, remember that the pursuit of perfect sound and video is ongoing. Small changes—like switching to locking banana plugs or adding a dedicated power conditioner—can yield remarkable results. Don’t wait for issues to surface; proactive upgrades can save you money and elevate your enjoyment.
What’s the one power or connection upgrade you’re considering next? Share your plans below—I’d love to hear how you’re aiming for cleaner, richer audio-video experiences!
}#}#**}}#}#**}**}#}#**}#}#**}**}#}#**}**}#}#**}**}#}#**}#}#**}**}#}#**}**}#}#**}**}#}#**}**}#}#**}#}#**}**}#}#**}**}#}#**}**}#}#**}**}#}#**}#}#**}**}#}#**}**}#}#**}**}#}#**}**}#}#**}#}#**}**}#}#**}#}#**}**}#}#**}**}#}#**}#}#**}**}#}#**}**}#}#**}#}#**}**}#}#**}#}#**}**}#}#**}#}#**}**}#}#**}**}#}#**}#}#**}**}#}#**}#}#**}**}#}#**}#}#**}**}#}#**}#}#**}**}#}#**}#}#**}**}#}#**}#}#**}**}#}#**}#}#**}**}#}#**}#}#**}**}#}#**}#}#**}**}#}#**}#}#**}**}#}#**}#}#**}**}#}#**}#}#**}**}#}#**}#}#**}**}#}#**}#}#**}**}#}#**}#}#**}**}#}#**}#}#**}**}#}#**}#}#**}**}#}#**}#}#**}**}#}#**}#}#**}**}#}#**}#}#**}**}#}#**}#}#**}**}#}#**}#}#**}**}#}#**}#}#**}**}#}#**}#}#**}**}#}#**}#}#**}**}#}#**}#}#**}**}#}#**}#}#**}**}#}#**}#}#**}**}#}#**}#}#**}**}#}#**}#}#**}**}#}#**}#}#**}**}#}#**}#}#**}**}#}#**}#}#**}**}#}#**}#}#**}**}#}#**}#}#**}**}#}#**}#}#**}**}#}#**}#}#**}**}#}#**}#}#**}**}#}#**}#}#**}**}#}#**}#}#**}**}#}#**}#}#**}**}#}#**}#}#**}**}#}#**}#}#**}**}#}#**}#}#**}**}#}#**}#}#**}**}#}#**}#}#**}**}#}#**}#}#**}**}#}#**}#}#**}**}#}#**}#}#**}**}#}#**}#}#**}**}#}#**}#}#**}**}#}#**}#}#**}**}#}#**}#}#**}**}#}#**}#}#**}**}#}#**}#}#**}**}#}#**}#}#**}**}#}#**}#}#**}**}#}#**}#}#**}**}#}#**}#}#**}**}#}#**}#}#**}**}#}#**}#}#**}**}#}#**}#}#**}**}#}#**}#}#**}**}#}#**}#}#**}**}#}#**}#}#**}**}#}#**}#}#**}**}#}#**}#}#**}**}#}#**}#}#**}**}#}#**}#}#**}**}#}#**}#}#**}**}#}#**}#}#**}**}#}#**}#}#**}**}#}#**}#}#**}**}#}#**}#}#**}**}#}#**}#}#**}**}#}#**}#}#**}**}#}#**}#}#**}**}#}#**}#}#**}**}#}#**}#}#**}**}#}#**}#}#**}**}#}#**}#}#**}**}#}#**}#}#**}**}#}#**}#}#**}**}#}#**}#}#**}**}#}#**}#}#**}**}#}#**}#}#**}**}#}#**}#}#**}**}#}#**}#}#**}**}#}#**}#}#**}**}#}#**}#}#**}**}#}#**}#}#**}**}#}#**}#}#**}**}#}#**}#}#**}**}#}#**}#}#**}**}#}#**}#}#**}**}#}#**}#}#**}**}#}#**}#}#**}**}#}#**}#}#**}**}#}#**}#}#**}**}#}#**}#}#**}**}#}#**}#}#**}**}#}#**}#}#**}**}#}#**}#}#**}**}#}#**}#}#**}**}#}#**}#}#**}**}#}#**}#}#**}**}#}#**}#}#**}**}#}#**}#}#**}**}#}#**}#}#**}**}#}#**}#}#**}**}#}#**}#}#**}**}#}#**}#}#**}**}#}#**}#}#**}**}#}#**}#}#**}**}#}#**}#}#**}**}#}#**}#}#**}**}#}#**}#}#**}**}#}#**}#}#**}**}#}#**}#}#**}**}#}#**}#}#**}**}#}#**}#}#**}**}#}#**}#}#**}**}#}#**}#}#**}**}#}#**}#}#**}**}#}#**}#}#**}**}#}#**}#}#**}**}#}#**}#}#**}**}#}#**}#}#**}**}#}#**}#}#**}**}#}#**}#}#**}**}#}#**}#}#**}**}#}#**}#}#**}**}#}#**}#}#**}**}#}#**}#}#**}**}#}#**}#}#**}**}#}#**}#}#**}**}#}#**}#}#**}**}#}#**}#}#**}**}#}#**}#}#**}**}#}#**}#}#**}**}#}#**}#}#**}**}#}#**}#}#**}**}#}#**}#}#**}**}#}#**}#}#**}**}#}#**}#}#**}**}#}#**}#}#**}**}#}#**}#}#**}**}#}#**}#}#**}**}#}#**}#}#**}**}#}#**}#}#**}**}#}#**}#}#**}**}#}#**}#}#**}**}#}#**}#}#**}**}#}#**}#}#**}**}#}#**}#}#**}**}#}#**}#}#**}**}#}#**}#}#**}**}#}#**}#}#**}**}#}#**}#}#**}**}#}#**}#}#**}**}#}#**}#}#**}**}#}#**}#}#**}**}#}#**}#}#**}**}#}#**}#}#**}**}#}#**}#}#**}**}#}#**}#}#**}**}#}#**}#}#**}**}#}#**}#}#**}**}#}#**}#}#**}**}#}#**}#}#**}**}#}#**}#}#**}**}#}#**}#}#**}**}#}#**}#}#**}**}#}#**}#}#**}**}#}#**}#}#**}**}#}#**}#}#**}**}#}#**}#}#**}**}#}#**}#}#**}**}#}#**}#}#**}**}#}#**}#}#**}**}#}#**}#}#**}**}#}#**}#}#**}**}#}#**}#}#**}**}#}#**}#}#**}**}#}#**}#}#**}**}#}#**}#}#**}**}#}#**}#}#**}**}#}#**}#}#**}**}#}#**}#}#**}**}#}#**}#}#**}**}#}#**}#}#**}**}#}#**}#}#**}**}#}#**}#}#**}**}#}#**}#}#**}**}#}#**}#}#**}**}#}#**}#}#**}**}#}#**}#}#**}**}#}#**}#}#**}**}#}#**}#}#**}**}#}#**}#}#**}**}#}#**}#}#**}**}#}#**}#}#**}**}#}#**}#}#**}**}#}#**}#}#**}**}#}#**}#}#**}**}#}#**}#}#**}**}#}#**}#}#**}**}#}#**}#}#**}**}#}#**}#}#**}**}#}#**}#}#**}**}#}#**}#}#**}**}#}#**}#}#**}**}#}#**}#}#**}**}#}#**}#}#**}**}#}#**}#}#**}**}#}#**}#}#**}**}#}#**}#}#**}**}#}#**}#}#**}**}#}#**}#}#**}**}#}#**}#}#**}**}#}#**}#}#**}**}#}#**}#}#**}**}#}#**}#}#**}**}#}#**}#}#**}**}#}#**}#}#**}**}#}#**}#}#**}**}#}#**}#}#**}**}#}#**}#}#**}**}#}#**}#}#**}**}#}#**}#}#**}**}#}#**}#}#**}**}#}#**}#}#**}**}#}#**}#}#**}**}#}#**}#}#**}**}#}#**}#}#**}**}#}#**}#}#**}**}#}#**}#}#**}**}#}#**}#}#**}**}#}#**}#}#**}**}#}#**}#}#**}**}#}#**}#}#**}**}#}#**}#}#**}**}#}#**}#}#**}**}#}#**}#}#**}**}#}#**}#}#**}**}#}#**}#}#**}**}#}#**}#}#**}**}#}#**}#}#**}**}#}#**}#}#**}**}#}#**}#}#**}**}#}#**}#}#**}**}#}#**}#}#**}**}#}#**}#}#**}**}#}#**}#}#**}**}#}#**}#}#**}**}#}#**}#}#**}**}#}#**}#}#**}**}#}#**}#}#**}**}#}#**}#}#**}**}#}#**}#}#**}**}#}#**}#}#**}**}#}#**}#}#**}**}#}#**}#}#**}**}#}#**}#}#**}**}#}#**}#}#**}**}#}#**}#}#**}**}#}#**}#}#**}**}#}#**}#}#**}**}#}#**}#}#**}**}#}#**}#}#**}**}#}#**}#}#**}**}#}#**}#}#**}**}#}#**}#}#**}**}#}#**}#}#**}**}#}#**}#}#**}**}#}#**}#}#**}**}#}#**}#}#**}**}#}#**}#}#**}**}#}#**}#}#**}**}#}#**}#}#**}**}#}#**}#}#**}**}#}#**}#}#**}**}#}#**}#}#**}**}#}#**}#}#**}**}#}#**}#}#**}**}#}#**}#}#**}**}#}#**}#}#**}**}#}#**}#}#**}**}#}#**}#}#**}**}#}#**}#}#**}**}#}#**}#}#**}**}#}#**}#}#**}**}#}#**}#}#**}**}#}#**}#}#**}**}#}#**}#}#**}**}#}#**}#}#**}**}#}#**}#}#**}**}#}#**}#}#**}**}#}#**}#}#**}**}#}#**}#}#**}**}#}#**}#}#**}**}#}#**}#}#**}**}#}#**}#}#**}**}#}#**}#}#**}**}#}#**}#}#**}**}#}#**}#}#**}**}#}#**}#}#**}**}#}#**}#}#**}**}#}#**}#}#**}**}#}#**}#}#**}**}#}#**}#}#**}**}#}#**}#}#**}**}#}#**}#}#**}**}#}#**}#}#**}**}#}#**}#}#**}**}#}#**}#}#**}**}#}#**}#}#**}**}#}#**}#}#**}**}#}#**}#}#**}**}#}#**}#}#**}**}#}#**}#}#**}**}#}#**}#}#**}**}#}#**}#}#**}**}#}#**}#}#**}**}#}#**}#}#**}**}#}#**}#}#**}**}#}#**}#}#**}**}#}#**}#}#**}**}#}#**}#}#**}**}#}#**}#}#**}**}#}#**}#}#**}**}#}#**}#}#**}**}#}#**}#}#**}**}#}#**}#}#**}**}#}#**}#}#**}**}#}#**}#}#**}**}#}#**}#}#**}**}#}#**}#}#**}**}#}#**}#}#**}**}#}#**}#}#**}**}#}#**}#}#**}**}#}#**}#}#**}**}#}#**}#}#**}**}#}#**}#}#**}**}#}#**}#}#**}**}#}#**}#}#**}**}#}#**}#}#**}**}#}#**}#}#**}**}#}#**}#}#**}**}#}#**}#}#**}**}#}#**}#}#**}**}#}#**}#}#**}**}#}#**}#}#**}**}#}#**}#}#**}**}#}#**}#}#**}**}#}#**}#}#**}**}#}#**}#}#**}**}#}#**}#}#**}**}#}#**}#}#**}**}#}#**}#}#**}**}#}#**}#}#**}**}#}#**}#}#**}**}
![Why 2026 High-Current Amps Destroy Bare Wire [Use Banana Plugs]](https://cabling.homeavreviewhub.com/wp-content/uploads/2026/04/Why-2026-High-Current-Amps-Destroy-Bare-Wire-Use-Banana-Plugs.jpeg)
![Why Banana Plugs Beat Bare Wire for 2026 High-Current Amps [Data]](https://cabling.homeavreviewhub.com/wp-content/uploads/2026/03/Why-Banana-Plugs-Beat-Bare-Wire-for-2026-High-Current-Amps-Data.jpeg)